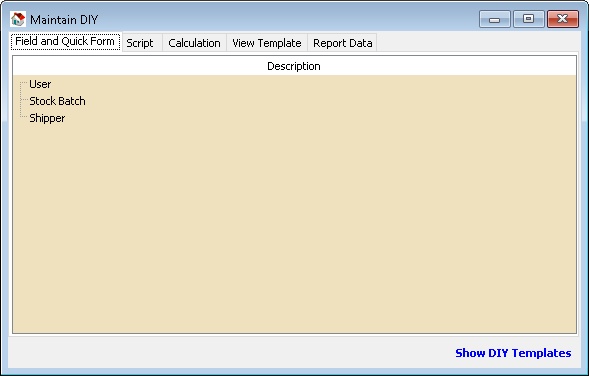
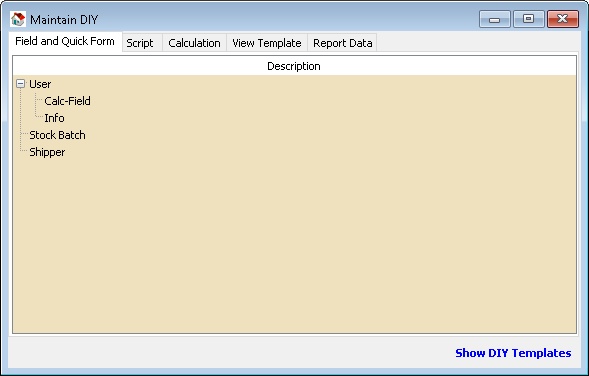
Menu: Tools | DIY | Maintain DIY...
Introduction
This Additional Module(DIY Fields & DIY Script Module)
| Function | Description |
|---|---|
| Field and Quick Form | User can Self Create new User Define Field(s) & Design the Layout |
| Script | Customise the Application |
| Calculation | Override the build in Calculation (SQL Payroll ONLY) |
| View Template | For Advance Form Mode |
| Report Data | Deprecated |
Field and Quick Form
Below is Example are doing following actions
- Create UDF_JobTitle at Maintain User
- Create New Form at Maintain User
Steps
- 01. Right Click at User
- 02. Select New Field
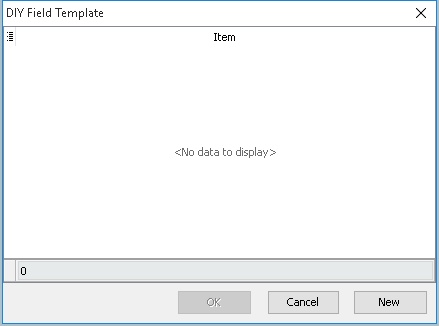
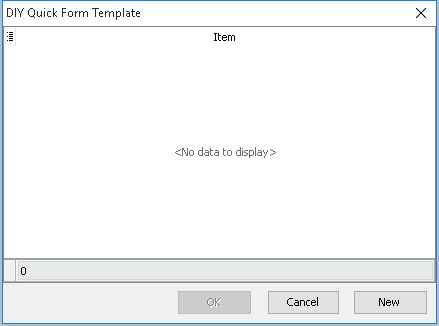
- 03. Click New button
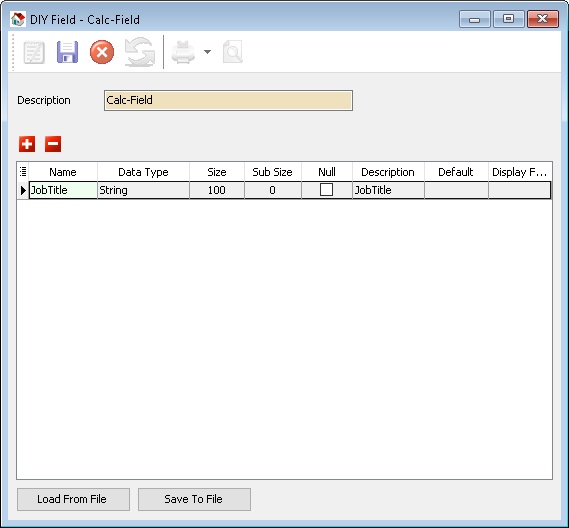
- 04. Enter any Description (eg Calc-Field) in the Description field (Only Alphanumeric & no spacing)
- 05. Click the + button to add the New UDF Field & Enter/Select the option as above picture
- 06. Click Save (the Blue Disc icon) after done
- 07. Close the windows.
- Available Data Field Type
| Field Type | Definition |
|---|---|
| String | Text data of a fixed length (up to 8192 bytes) |
| Unicode String | A field representing a Unicode (16 bits per character) string. |
| Boolean | A Boolean value. |
| Integer | Whole numbers in the range of long integers (32 bits). |
| Currency | Currency values with the same range as the Real data type. |
| Bcd | Real numbers with a fixed number of digits after the decimal point. |
| Date | A date value. |
| Blob | Binary data with no size limit (BLOB stands for binary large object). The theoretical maximum limit is 2 GB. |
| Memo | Text of arbitrary length. |
- ----------------------------------------------------------------------------------------------------------------------------------------------------
- ----------------------------------------------------------------------------------------------------------------------------------------------------
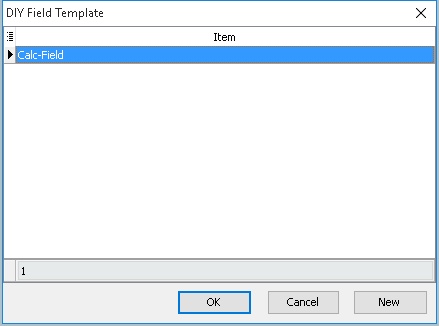
- 08. Select the Item just created (eg. Calc-Field)
- 09. Click Ok button
- 10. Right Click at User again
- 11. Select New Quick Form
- 12. Click New button
- 13. Enter any Description to be shown at Maintain User(eg Info) in the Description field (Only Alphanumeric & no spacing)
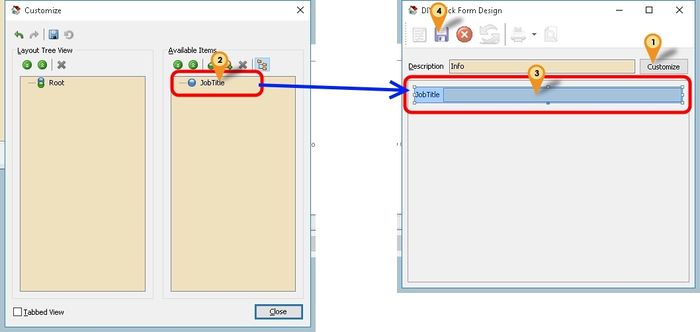
- 14. Click Customize button (Icon 1)
- 15. Drag the UDF Field from the Available Items (Icon 2) to empty space (Icon 3)
- 16. Click Close button to Customize windows
- 17. Click Save (Icon 4) after done
- 18. Close the windows.
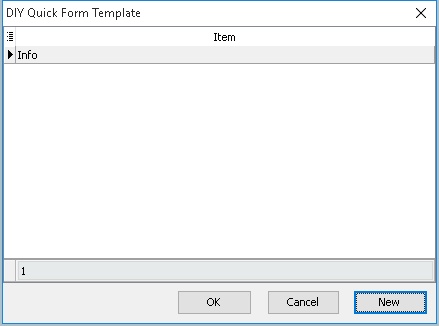
- 19. Select the Item just created (eg. Info)
- 20. Click Ok button
- 21. Done.
Script
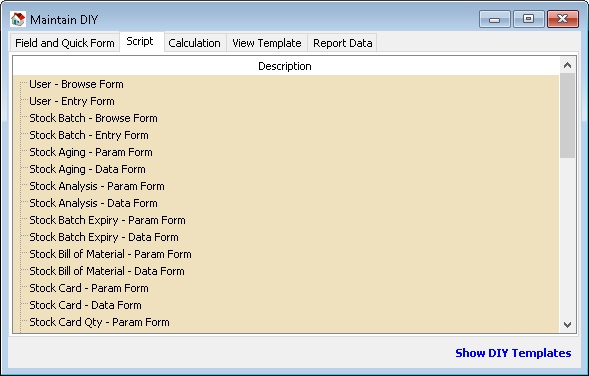
This is Additional Module(DIY Script Module) which allow user to override or customise the SQL System.
The Language use is Pascal
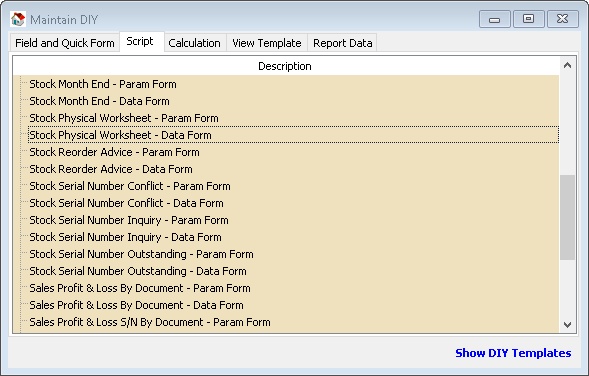
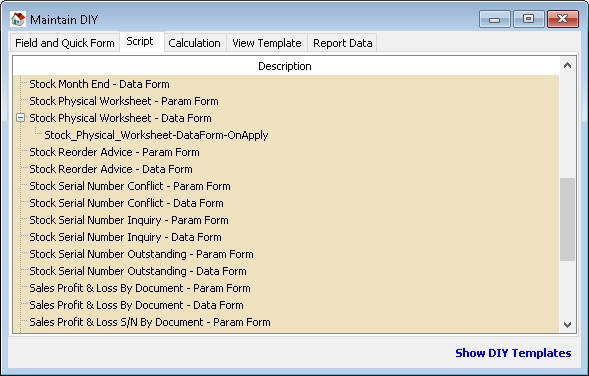
Available forms to customise
| Form Type | Example | Description |
|---|---|---|
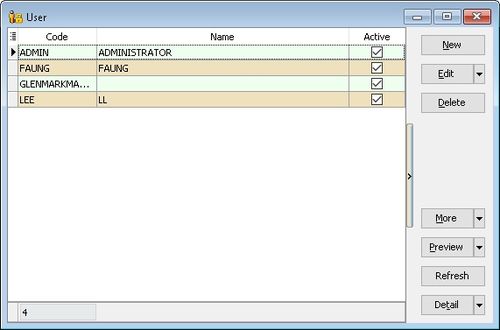
| Browse Form | Script Run/Execute when in Browse window form | |
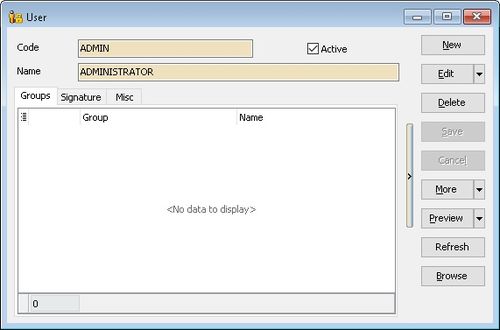
| Entry Form | Script Run/Execute when in Data Entry window form | |
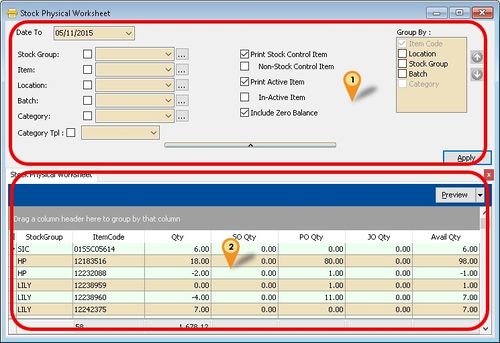
| Param Form | Script Run/Execute when at in Icon 1 (Seldom use) | |
| Data Form | Script Run/Execute when at in Icon 2 (Frequently use) |
Available Action/Event
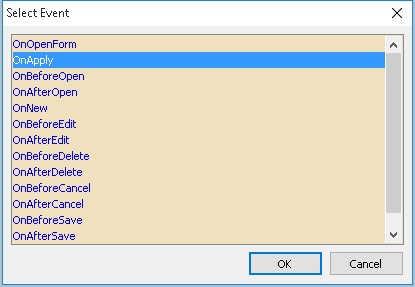
Action/Event Description OnOpenForm The script trigger On Open the Form (eg On Open the Sales Invoice Form) OnApply The script trigger After Click Apply button (for Data Form) OnBeforeOpen The script trigger On Before the Form Open OnAfterOpen The script trigger On After the Form Open OnNew The script trigger after the build in New Button action Execute. OnBeforeEdit The script trigger before the build in Edit Button action execute. OnAfterEdit The script trigger after the build in Edit Button action Execute. OnBeforeDelete The script trigger before the build in Delete Button action execute. OnAfterDelete The script trigger after the build in Delete Button action Execute. OnBeforeCancel The script trigger before the build in Cancel Button action execute. OnAfterCancel The script trigger after the build in Cancel Button action Execute. OnBeforeSave The script trigger before the build in Save Button action execute. OnAfterSave The script trigger after the build in Save Button action Execute.
Example 1 - List Serial Number in Stock Physical Worksheet
Below is Example are doing following actions
- After apply Stock Physical Worksheet will auto Create New Tab
- List all the Serial Number in the new Grid
Last Script Update : 11 Nov 2015
Level : Advance
Steps
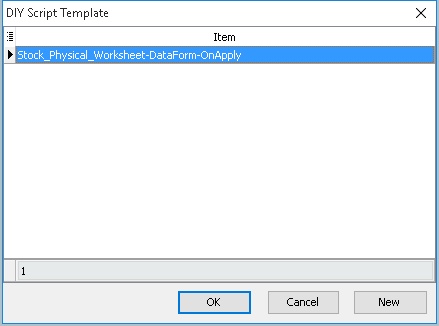
- 01. Right Click at Stock Physical Worksheet - Data Form
- 02. Select New Script
- 03. Select OnApply
- 04. Click OK button
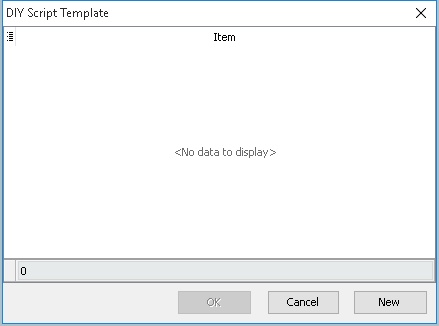
- 05. Click New Button
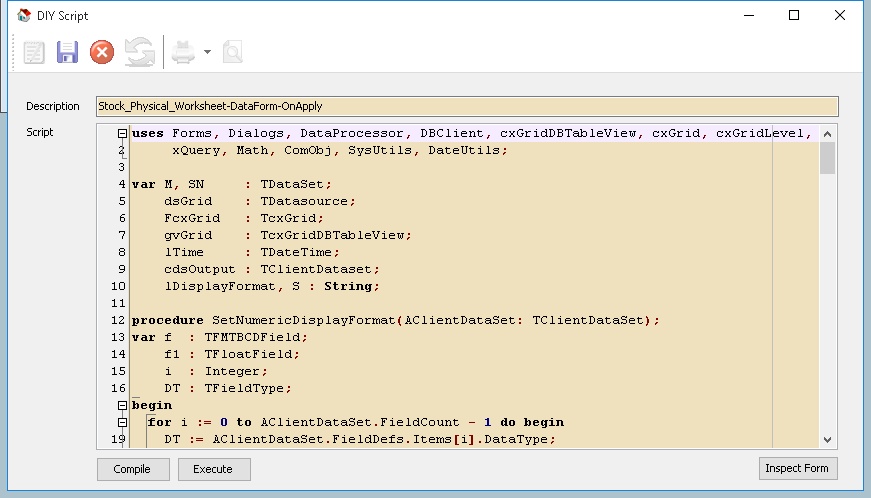
- 06. Enter any description (eg Stock_Physical_Worksheet-DataForm-OnApply) in the Description field (Only Alphanumeric & no spacing)
- 07. Copy below script & paste to the Script Field
| DataForm-OnApply Script |
|---|
uses Forms, Dialogs, DataProcessor, DBClient, cxGridDBTableView, cxGrid, cxGridLevel,
     xQuery, Math, ComObj, SysUtils, DateUtils;

var M, SN     : TDataSet;
    dsGrid    : TDatasource;
    FcxGrid   : TcxGrid;
    gvGrid    : TcxGridDBTableView;
    lTime     : TDateTime;
    cdsOutput : TClientDataset;
    lDisplayFormat, S : String;

procedure SetNumericDisplayFormat(AClientDataSet: TClientDataSet);
var f  : TFMTBCDField;
    f1 : TFloatField;
    i  : Integer;
    DT : TFieldType;
begin
  for i := 0 to AClientDataSet.FieldCount - 1 do begin
    DT := AClientDataSet.FieldDefs.Items[i].DataType;
    if DT = ftFMTBcd then begin
      f := TFMTBCDField(AClientDataSet.Fields.Fields[i]);
      if not (f = nil) then f.DisplayFormat := lDisplayFormat;
    end;
    if DT = ftFloat then begin
      f1 := TFloatField(AClientDataSet.Fields.Fields[i]);
      if not (f1 = nil) then f1.DisplayFormat := lDisplayFormat;
    end;
  end;
end;

procedure PrepareNewTab;
begin
  FcxGrid.RootLevelOptions.DetailTabsPosition := dtpTop;
  gvGrid := FcxGrid.CreateView('TcxGridDBTableView') as TcxGridDBTableView;
  with FcxGrid.Levels.Add do begin
    Caption  := 'Calc';
    GridView := TcxCustomGridView(gvGrid);
    Active   := True;
  end;

  with gvGrid do begin
    Name                             := 'Restricted_1';
    OptionsCustomize.ColumnFiltering := True;
    OptionsView.ColumnAutoWidth      := False;
    OptionsView.Footer               := True;
    OptionsView.GroupByBox           := False;
    OptionsBehavior.IncSearch        := True;
    DataController.DataSource        := dsGrid;
    OptionsData.Editing              := False;
  end;
end;

procedure TuneGrid;
var i : integer;
    DT : TFieldType;
begin
  SetNumericDisplayFormat(cdsOutput);
  with gvGrid.DataController do begin
    DataSource := dsGrid;
    CreateAllItems(False);
  end;
  with gvGrid do begin
    //Hide Columns
    //GetColumnByFieldName('DtlKey').Visible          := False;
    //Rename Columns Caption
    GetColumnByFieldName('ItemCode').Caption        :='Item Code';
  end;

  with gvGrid.DataController.Summary do begin
    BeginUpdate;
    try
      with TcxGridDBTableSummaryItem(FooterSummaryItems.Add) do begin
        Column   := gvGrid.Columns[0];
        Position := spFooter;
        Kind     := skCount;
        Format   := 'Count = #';
      end;
      for i := 0 to cdsOutput.FieldDefs.Count-1 do begin
        DT := cdsOutput.FieldDefs.Items[i].DataType;
        if (DT = ftFMTBcd) or (DT = ftFloat) then begin
          with TcxGridDBTableSummaryItem(FooterSummaryItems.Add) do begin
            Column   := gvGrid.Columns[i];
            Position := spFooter;
            Kind     := skSum;
            Format   := lDisplayFormat;
          end;
        end;
      end;
      finally
        EndUpdate;
    end;
  end;
  gvGrid.ApplyBestFit(nil, False, False);
end;

procedure CreateXMLTable;
begin
  if Assigned(cdsOutput) then
    cdsOutput.Free;
  cdsOutput := TClientDataSet.Create(FcxGrid);
  cdsOutput.FieldDefs.Assign(SN.FieldDefs);
  cdsOutput.CreateDataSet;
  dsGrid.DataSet := cdsOutput;
end;

procedure AppendData;
var i : integer;
begin
  M.First;
  while not M.Eof do begin
    SN.DisableControls;
    SN.First;
    While not SN.Eof do begin
      cdsOutput.Append;
      for i:=0 to SN.FieldDefs.Count-1 do
        cdsOutput.FindField(SN.FieldDefs.Items[i].Name).Value := SN.FindField(SN.FieldDefs.Items[i].Name).Value;
      cdsOutput.Post;
      SN.Next;
    end;
    SN.EnableControls;
    M.Next;
  end;
end;

begin
  M       := Self_DataProcessor.GetDataSetByName('Main');
  SN      := Self_DataProcessor.GetDataSetByName('SerialNumber');
  FcxGrid := TcxGrid(Self.FindComponent('cxGrid1'));
  dsGrid  := TDataSource.Create(M);

  lTime := now;
  s := 'Stock Physical Worksheet';
  lDisplayFormat := '#,0.00;-#,0.00;-';


  try
    Self.Caption := s + '- Prepare Tab';
    PrepareNewTab;
    Self.Caption := s + '- Prepare XML';
    CreateXMLTable;
    Self.Caption := s + '- Append Data';
    AppendData;
    Self.Caption := s + '- Tuning Grid';
    TuneGrid;
  finally

    lTime := Now - lTime;
    Self.Caption := Format(s + ' - [Elapsed Time: %s ]',[FormatDateTime ('hh:nn:ss:zzz', lTime)]);
  end;
end.
|
- 08. Click Save (the Blue Disc Icon)
- 09. Close the window.
- 10. Select the Item just created (eg. Stock_Physical_Worksheet-DataForm-OnApply)
- 11. Click OK button
- 12. Click Stock | Print Stock Physical Worksheet | Apply
Example 2 - Set Default Filtering for Sales
Below is Example are doing following actions
- Filter by Agent in Sales Profit & Loss By Document
- Disable Selection for Agent
Last Script Update : 03 Feb 2016
Level : Basic
Steps
- 01. Right Click at Sales Profit & Loss By Document - Param Form
- 02. Select New Script
- 03. Select OnOpenForm
- 04. Click OK button
- 05. Click New Button
- 06. Enter any description (eg SL-PnL-ParamForm-OnOpen) in the Description field (Only Alphanumeric & no spacing)
- 07. Copy below script & paste to the Script Field
| Param Form - OnOpenForm Script |
|---|
uses SysUtils, Dialogs, Forms;

var C, D : TControl;
    L: TStringList;
begin
  C := Self.FindChildControl('edAgent_Panel') as TWinControl;
  L := TStringList.Create;
  try
    if C <> nil then C.Enabled := False; // Disable Selection
    C := TWinControl(C).FindChildControl('edAgent_Edit') as TWinControl;
    L.Add('NF');
    L.Add('LF');
    (C as TControl).SetTextBuf(L.CommaText);//For Multi Records
//    (C as TControl).SetTextBuf('LF');//For 1 record
  finally
    L.Free;
  end;
end.
|
- 08. Click Save (the Blue Disc Icon)
- 09. Close the window.
- 10. Select the Item just created (eg. SL-PnL-ParamForm-OnOpen)
- 11. Click OK button
- 12. Click Sales | Print Profit & Loss By Document...
Example 3 - Drop down list at Maintain User
Below is Example are doing following actions
- Create a drop down list of Project List at Maintain User
Last Script Update : 15 Feb 2016
Level : Advance
Steps
- 01. Right Click at User - Entry Form
- 02. Select New Script
- 03. Select OnOpenForm
- 04. Click OK button
- 05. Click New Button
- 06. Enter any description (eg UserEntryForm-OnOpen) in the Description field (Only Alphanumeric & no spacing)
- 07. Copy below script & paste to the Script Field
| Entry Form - OnOpen Script |
|---|
uses Forms, StdCtrls, DBCtrls, Dialogs, ComObj, DBClient;

Var edProject     : TDBLookupComboBox;
    btnCPassword  : Tbutton;
    M, dsList     : TDataSource;
    lbProject     : TComponent;
    C             : TControl;
    FComServer    : Variant;
    cdsList       : TClientDataset;

function ComServer: Variant;
begin
  if FComServer = Null then begin
    FComServer := CreateOleObject('SQLAcc.BizApp');
  end;
  Result := FComServer;
end;

procedure GetList;
var lSQL    : String;
begin
  FComServer := null;
  cdsList := TClientDataset.Create(C);
  lSQL := 'SELECT Code, Description FROM Project WHERE IsActive=''T'' ';

  try
    cdsList.Data := ComServer.DBManager.Execute(lSQL);
    dsList.Dataset := cdsList;
  finally
    FComServer := null;
  end;
end;

begin
  M := TDataSource(Self.FindComponent('dsMain'));
  C := Self.FindChildControl('lbName');
  dsList := TDataSource.Create(C);
  GetList;
  if Assigned(C) then begin
    edProject   := TDBLookupComboBox.Create(C);
    lbProject  := TLabel.Create(C);

    with TLabel(lbProject) do begin
      Parent     := C.Parent;
      Caption    := '&1. Project :';
      Left       := 200;
      Top        := 68;
      FocusControl := edProject;
    end;

    with edProject do begin
      Parent  := C.Parent;
      Top     := 65;
      Left    := 260;
      Width   := 120;
      Name    := 'edProject';
      Datasource     := M;
      ListSource     := dsList;
      DataField      :='UDF_Project';
      DropDownWidth  := 500;
      KeyField       := 'Code';
      ListFieldIndex := 1; //Search By Description
      ListField      := 'Code;Description'; //Show 2 Column
    end;
  end;
end.
|
- 08. Click Save (the Blue Disc Icon)
- 09. Close the window.
- 10. Select the Item just created (eg. UserEntryForm-OnOpen)
- 11. Click OK button
- 12. Click Sales | Print Profit & Loss By Document...
Example 4 -
- More Coming Soon...
Calculation
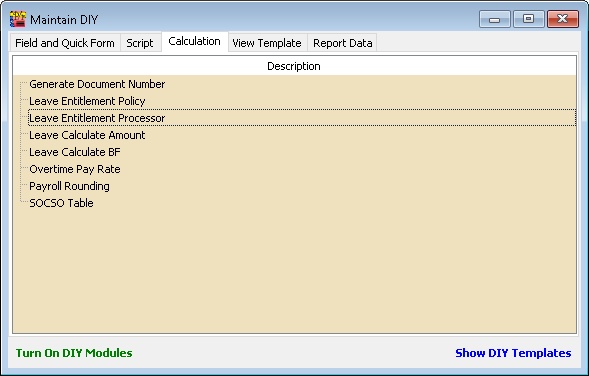
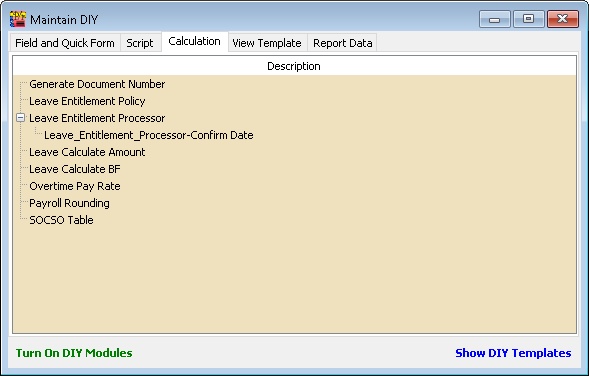
This section is mostly use in SQL Payroll. User can override the build in Calculation/Formula to suite their requirement.
The Language use is Pascal.
Available Calculation Types
| Type | Description |
|---|---|
| Generate Document Number | Manipulate the Next Document Number Format. |
| Leave Entitlement Policy | Manipulate yearly Leave Entitlement |
| Leave Entitlement Processor | Manipulate Calculation of Year of working |
| Leave Calculate Amount | Manipulate the Leave Calculation Amount |
| Leave Calculate BF | Calculate how many leave can be Brought Forward if not fully taken |
| Overtime Pay Rate | Manipulate the Overtime Pay rate |
| Payroll Rounding | Manipulate the Net Pay Amount |
| SOCSO Table | Manipulate the Sosco Deduction Amount |
Example 1 - Leave Entitlement Processor - Calculate from Confirm Date
Below is Example to change the Leave Entitlement Processor to be calculate from the Confirmation Date
Last Script Update : 15 Jan 2016
Level : Basic
Steps
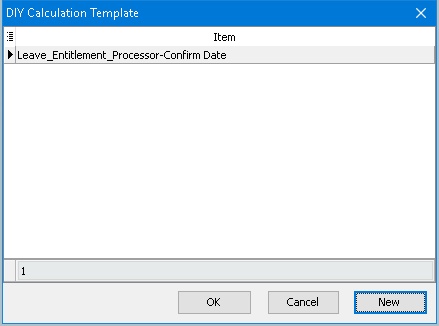
- 01. Right Click at Leave Entitlement Processor
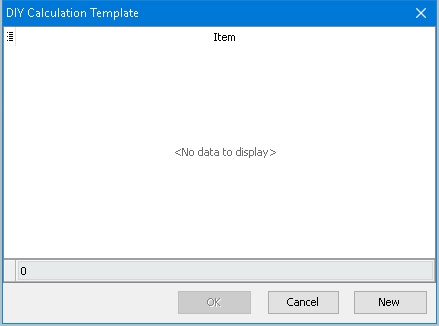
- 02. Select New Calculation
- 03. Click New Button
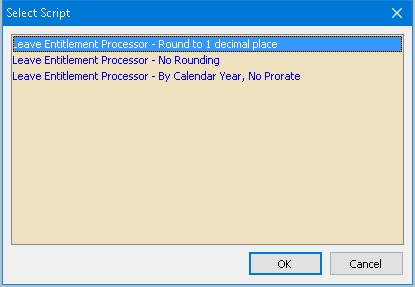
| Formula | Description |
|---|---|
| Leave Entitlement Processor - Round to 1 decimal place | Round to 1 Decimal point if Result had fraction |
| Leave Entitlement Processor - No Rounding | Truncate the Result |
| Leave Entitlement Processor - By Calendar Year, No Prorata | Calculate by month & No Prorata (Base on Malaysia Labour Law) |
- 04. Select any Formula which suit you & Click OK
- 05. Enter any Description (eg Leave_Entitlement_Processor-Confirm Date) in the Description field (Only Alphanumeric & no spacing)
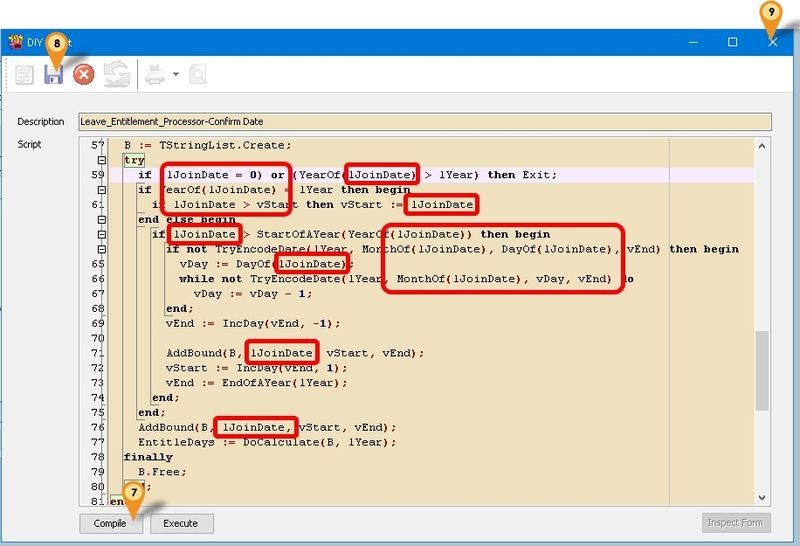
- 06. In the Script look for the word lJoinDate & change it to lConfirmDate or
- Copy below script & paste to the Script Section
| Leave Entitlement Processor - Round to 1 decimal place |
|---|
// Example Leave Entitlement Processor - Round to 1 decimal place
uses Classes, DateUtils, Math, EntitlePolicy;

function DoCalculate(const B: TStringList; const aProcessYear: Integer): Currency;
var i, WorkYear: Integer;
    TotalDays: Double;
begin
  Result := 0;
  for i := 0 to B.Count - 1 do begin
    WorkYear := StrToInt(B[i]) div 1000;
    TotalDays := StrToInt(B[i]) mod 1000;
    Result := Result + (TotalDays / DaysInAYear(aProcessYear)) * GetEntitleDays(WorkYear);
  end;

//  // Round to 0.5 days
//  V := Result - Trunc(Result);
//  if (V < 0.5) and (V > 0) then
//    Result := Trunc(Result) + 0.5
//  else
  Result := SimpleRoundToEx(Result, -1);
end;

procedure AddBound(const B: TStringList; const aDate, aStartDate, aEndDate: TDateTime);
var D: TDateTime;
    vDay, Y: Integer;
begin
  vDay := DayOf(aDate);
  while not TryEncodeDate(YearOf(aEndDate), MonthOf(aDate), vDay, D) do
    vDay := vDay - 1;
  Y := YearOf(aEndDate) - YearOf(aDate);
  if D <= aEndDate then
    Y := Y + 1;
  B.Add(IntToStr((Y * 1000) + Trunc(aEndDate - aStartDate) + 1));
end;

var B: TStringList;
    vStart, vEnd: TDateTime;
    vDay: Integer;
begin
  vStart := StartOfAYear(lYear);
  vEnd := EndOfAYear(lYear);

  B := TStringList.Create;
  try
    if (lConfirmDate = 0) or (YearOf(lConfirmDate) > lYear) then Exit;
    if YearOf(lConfirmDate) = lYear then begin
      if lConfirmDate > vStart then vStart := lConfirmDate;
    end else begin
      if lConfirmDate > StartOfAYear(YearOf(lConfirmDate)) then begin
        if not TryEncodeDate(lYear, MonthOf(lConfirmDate), DayOf(lConfirmDate), vEnd) then begin
          vDay := DayOf(lConfirmDate);
          while not TryEncodeDate(lYear, MonthOf(lConfirmDate), vDay, vEnd) do
            vDay := vDay - 1;
        end;
        vEnd := IncDay(vEnd, -1);

        AddBound(B, lConfirmDate, vStart, vEnd);
        vStart := IncDay(vEnd, 1);
        vEnd := EndOfAYear(lYear);
      end;
    end;
    AddBound(B, lConfirmDate, vStart, vEnd);
    EntitleDays := DoCalculate(B, lYear);
  finally
    B.Free;
  end;
end.
|
- 07. Click Compile button to make sure is Compile success.
- 08. Click Save button
- 09. Click X to Close
- 10. Select the Item just created (eg Leave_Entitlement_Processor-Confirm Date)
- 11. Click Ok button
- 12. Done & Remember to set it at Maintain Leave Group under the Process Column
Example 2 - Leave Calculate Amount - Unpaid Leave Amount Base on Working Day
Below is example to change the Unpaid Leave Amount to base on Working Days in Maintain Contribution
Last Script Update : 19 Jan 2016
Level : Basic
Steps
- 01. Right Click at Leave Calculate Amount
- 02. Select New Calculation
- 03. Click New Button
| Formula | Description |
|---|---|
| Leave Calculate Amount - Based On Employee Default Wages | The Calculation will use Wages amount at Maintain Employee |
| Leave Calculate Amount - Based On Employee Default Wages And Allowance | The Calculation will use Wages & Allowance amount at Maintain Employee |
- 04. Select any Formula which suit you & Click OK
- 05. Enter any Description (eg Leave_Calculate_Amt-Unpaid) in the Description field (Only Alphanumeric & no spacing)
- 06. In the Script look for the word DaysBetweenStartAndEndDate & change it to WorkingDayPerMonth or
- Copy below script & paste to the Script Section
| Leave Calculate Amount - Based On Employee Default Wages |
|---|
// Example - Leave Calculate Amount - Based On Employee Default Wages
uses DB, DateUtils;

begin
  Amount := DefaultWages / WorkingDayPerMonth;
end.
|
- 07. Click Compile button to make sure is Compile success.
- 08. Click Save button
- 09. Click X to Close
- 10. Select the Item just created (eg Leave_Calculate_Amt-Unpaid)
- 11. Click Ok button
- 12. Done & Remember to set it at Maintain Leave Group under the Amount Column for UL
Example 3 -
- More coming soon...
