Module that can be import from MYOB System
| Data Migration from MYOB | Module | Data Migration from MYOB | Module | Data Migration from MYOB | Module |
|---|---|---|---|---|---|
| Chart of Account | Yes | Customer Master | Yes | Supplier Master | Yes |
| Stock Master | Yes | Project Master | Yes | Area Master | Yes |
| Agent Master | Yes | Terms Master | Yes | Currency Master | Yes |
Setting of MYOB Backup file
Here are the step-by-step guide how to do with MYOB database before import into SQL:-
- Get the MYOB Backup file ( XXX_20160908.zip ) and place the backup file to the Desktop, example C:\Users\SQL\Desktop\MYOB.
- Download 7 Zip to extract MYOB Backup file. Download Path for 7 Zip
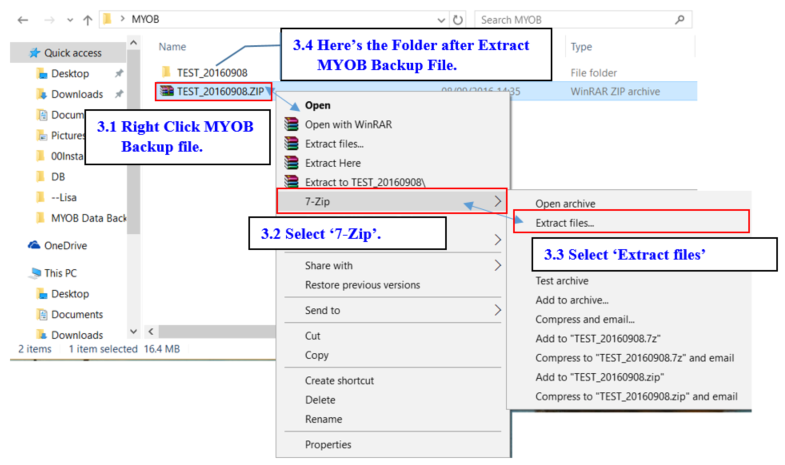
- Refer Image below on How to Extract MYOB Backup file.
* Make sure install the right one or else you cannot find 7 zip to Extract.
- 3.1 Right click on MYOB Backup file.
- 3.2 Select "7-Zip"
- 3.3 Select "Extract Files"
- 3.4 Extracted file will show as another folder.
Import Data from MYOB
Import Account Master Data
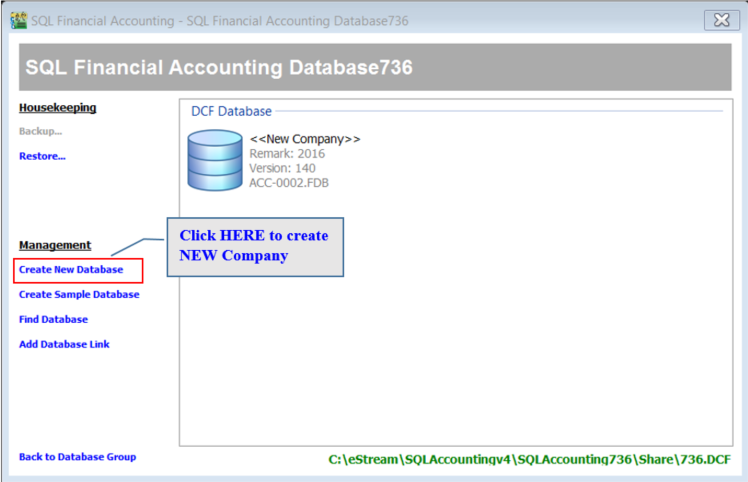
- Create New Database then Log On New Company with ADMIN User.
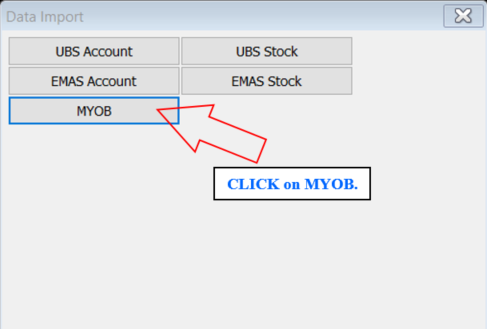
- Once Log On, Go to File | Data Import |Select MYOB.
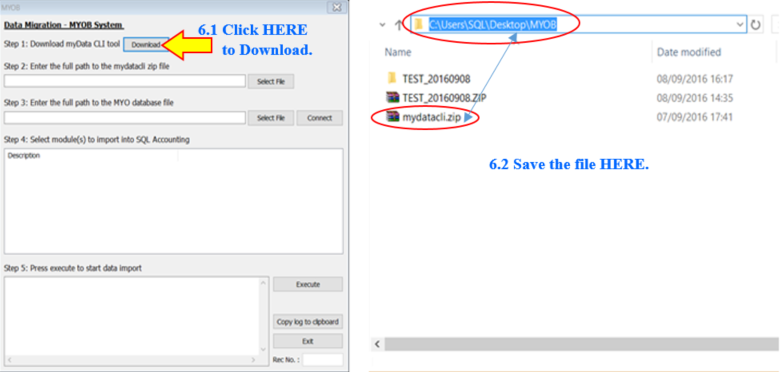
- Click on the "Download button" to download a compulsory tool before import MYOB, then place the 'myData CLI' to C:\Users\SQL\Desktop\MYOB.
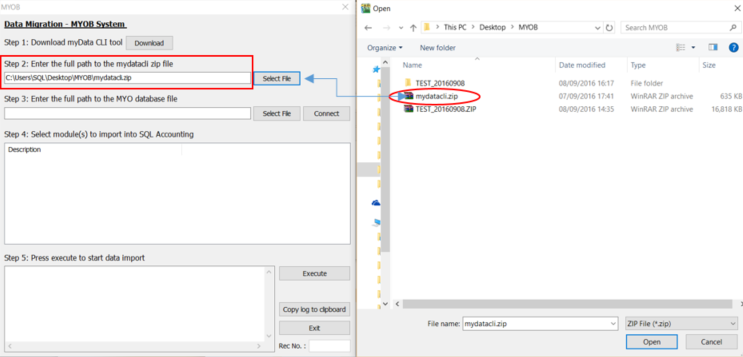
- Click on the "Select File" button and look into C:\Users\SQL\Desktop\MYOB to select 'mydatacli.zip'.
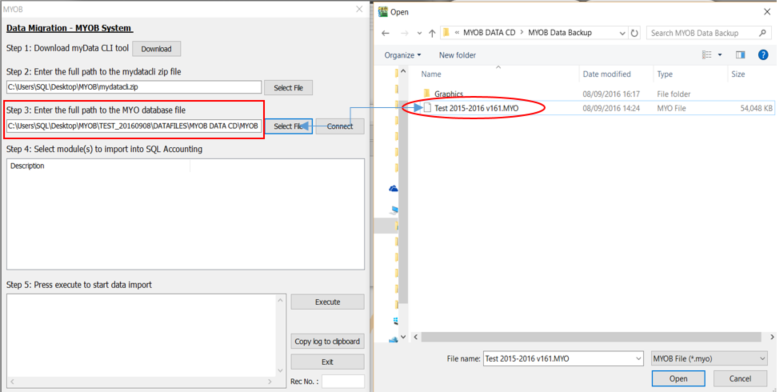
- Click "Select File" button then look into "C:\Users\SQL\Desktop\MYOB\TEST_20160908\DATAFILES\MYOB DATA CD\MYOB Data Backup" to select "Test 2015-2016v161.MYO" (MYOB Backup File)
- Refer step below to start import.
Those highlighted in BOLD is based on own Company Name of MYOB Backup.
- 6.1 Click Connect
- 6.2 Select Chart of Account.
- 6.3 Click Execute to Import
- 6.4 Once done import Chart of Account, click OK to close the message.
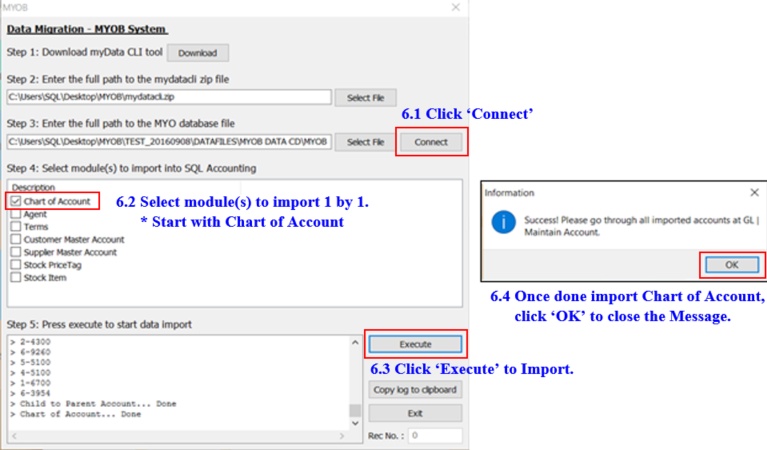
- 7.1(a) Read the Information then click "OK" to close it
- 7.1(b) Close the Data Import.

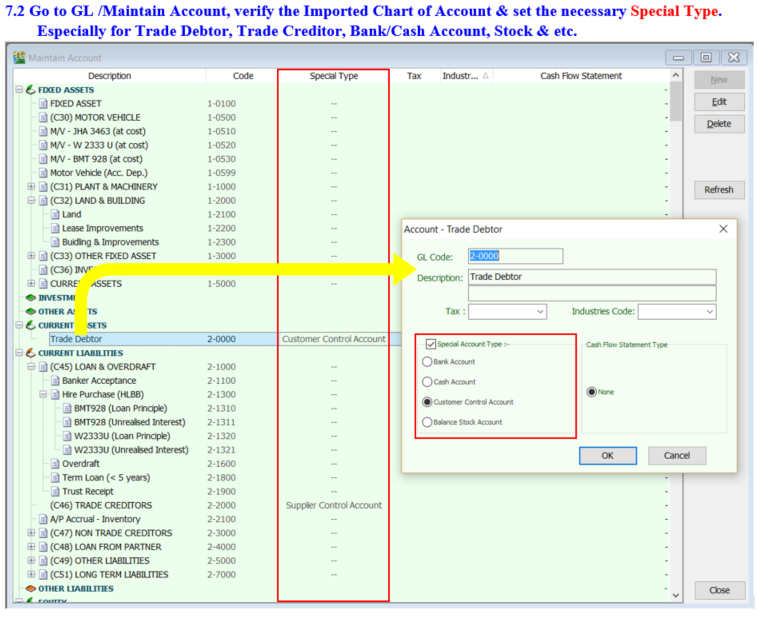
- 7.2 Go to GL | Maintain Account, verify the Imported Chart of Account & set the necessary Special Type. Especially for Trade Debtor, Trade Creditor, Bank/Cash Account, Stock & etc.
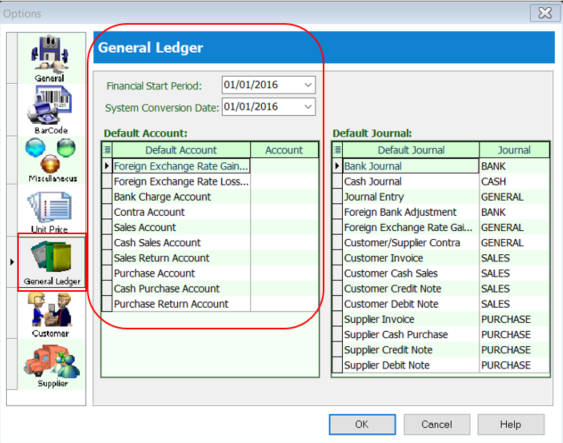
- 7.3 Go to Tools | Options | General Ledger, to setup for :
- System Conversion Date
- Default Account
Import Others Master Data
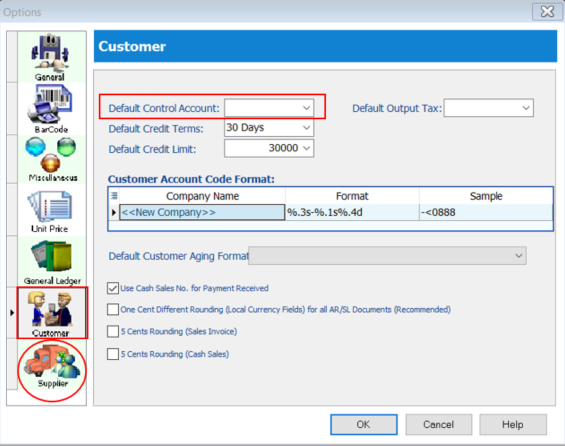
- 7.4 Go to Tools | Options | Customer and update Default Control Account. Same things apply on Supplier.
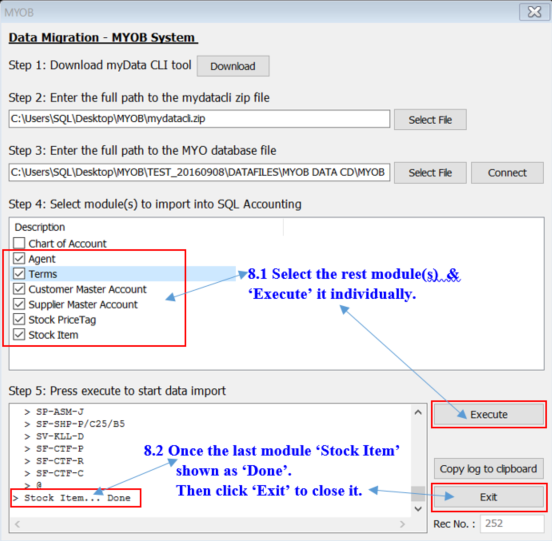
- 8.1 Select the rest of the modules & click Execute.
- 8.2 Once the last module "Stock Item" shown as "Done" then click Exit to close it.
