No edit summary |
|||
| (7 intermediate revisions by the same user not shown) | |||
| Line 32: | Line 32: | ||
|} | |} | ||
<br /> | <br /> | ||
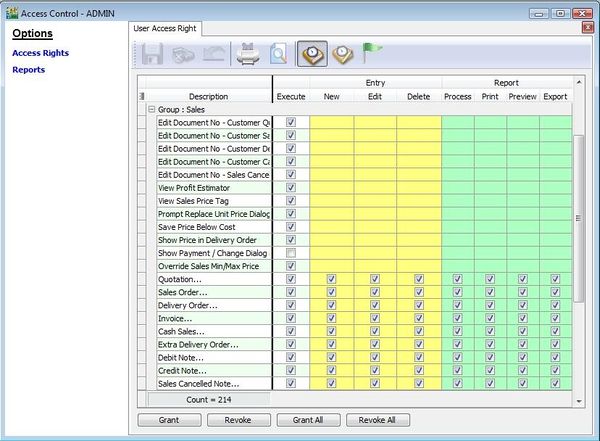
:4. Click on Access Control, you will get the below | :4. Click on Access Control, you will get the screenshot below. | ||
::[[File:Tools-Maintain User Group-04.jpg |600px]]<br /> | ::[[File:Tools-Maintain User Group-04.jpg |600px]]<br /> | ||
::{| class="wikitable" | ::{| class="wikitable" | ||
| Line 83: | Line 83: | ||
==EXTRA: User Group and User Access Rights== | ==EXTRA: User Group and User Access Rights== | ||
:The Group and user access rights logic: | :1. The Group and user access rights logic: | ||
::{| class="wikitable" | ::{| class="wikitable" | ||
|- | |- | ||
| Line 117: | Line 117: | ||
|- | |- | ||
| FALSE || TRUE || TRUE || TRUE | | FALSE || TRUE || TRUE || TRUE | ||
|} | |} | ||
:2. For example, | |||
:For example, | |||
::{| class="wikitable" | ::{| class="wikitable" | ||
|- | |- | ||
! Modules !! Group 1 !! Group 2 !! User !! Overall Rights | ! Modules !! Group 1 !! Group 2 !! User !! Overall Rights | ||
|- | |- | ||
| GL || &radic || | | GL || style="text-align:center;"| √ || style="text-align:center;"| x || style="text-align:center;"| x || style="text-align:center;"| √ | ||
|- | |- | ||
| Customer || | | Customer || style="text-align:center;"| x || style="text-align:center;"| √ || style="text-align:center;"| x || style="text-align:center;"| √ | ||
|- | |- | ||
| Supplier || | | Supplier || style="text-align:center;"| x || style="text-align:center;"| x || style="text-align:center;"| √ || style="text-align:center;"| √ | ||
|- | |- | ||
| Sales || | | Sales || style="text-align:center;"| √ || style="text-align:center;"| √ || style="text-align:center;"| x || style="text-align:center;"| √ | ||
|- | |- | ||
| Purchase || | | Purchase || style="text-align:center;"| x || style="text-align:center;"| √ || style="text-align:center;"| √ || style="text-align:center;"| √ | ||
|- | |- | ||
| Stock || | | Stock || style="text-align:center;"| x || style="text-align:center;"| x || style="text-align:center;"| x || style="text-align:center;"| x | ||
|} | |}<br /> | ||
:3. From the above sample table, it means the overall rights will depends on either groups or user rights to the module. | |||
<br /> | |||
Latest revision as of 02:35, 3 February 2016
Menu: Tools | Maintain User Group...
Introduction
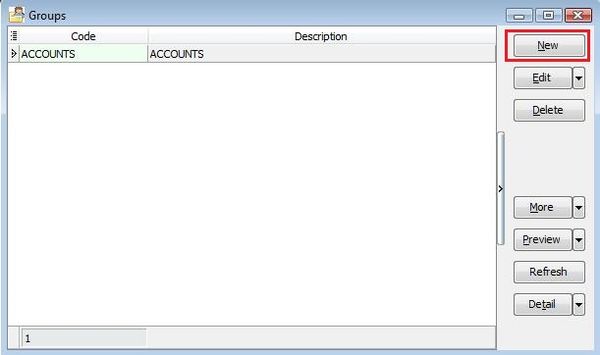
- Although the maintain user itself able to copy and paste user; or export and import user access rights. Using Maintain User Group is an ideal method to apply the same access rights to certain users.
Maintain User Group
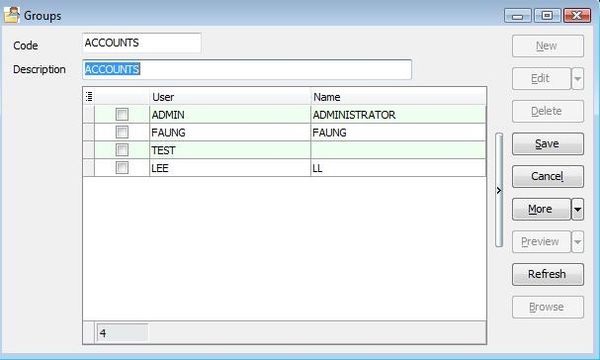
- 2. From this Maintain User Group…, you can straight away tick the users to be included in this group.
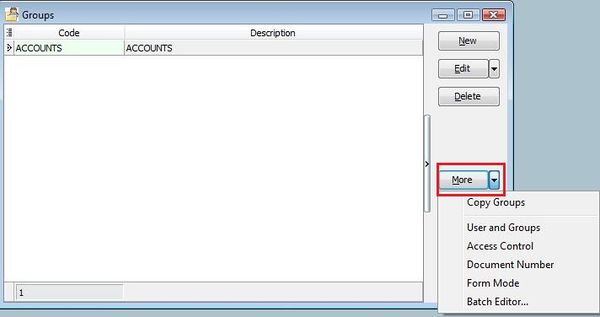
No Label Name Explanation 1 Copy Group To copy the existing group all the setting, including the access rights. 2 User and Group To define the user and group immediately. 3 Access Control To set the access rights for the modules. 4 Document Number For multiple document number set, you able to assign it to different users. 5 Form Mode Maintain Form Mode…) to different users. 6 Batch Editor You able to change the group code and description in batch basis without editing each group.
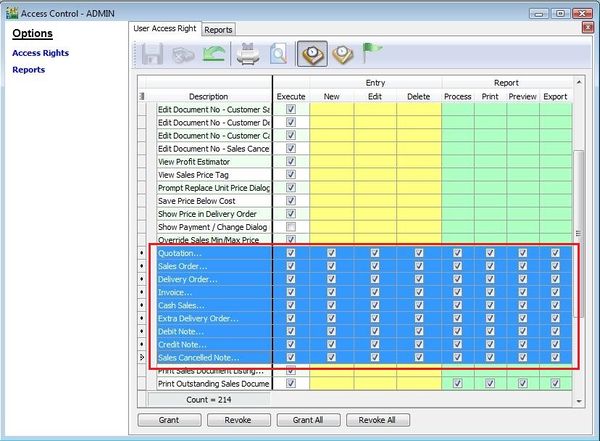
No Label Name Explanation 1 Execute To use the functions from the menu list. 2 New To create new documents. 3 Edit To modify the documents. 4 Delete To delete the documents. 5 Process N/A to SQL Accounting. It apply to SQL Payroll. 6 Print To print. 7 Preview To preview. 8 Export To export.
No Label Name Explanation 1 Grant Action button to grant the access rights. 2 Revoke Action button to disallow the access rights. 3 Grant All Action button to grant all the access rights. 4 Revoke All Action button to disallow all the access rights.
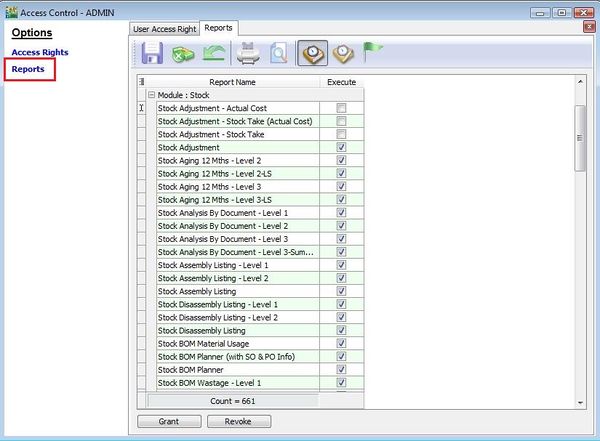
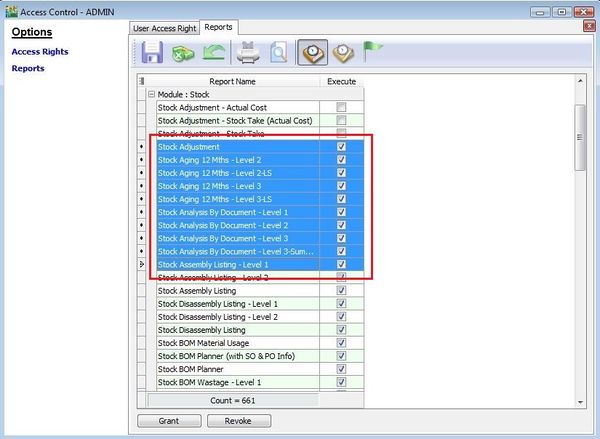
- 6. Click on Reports from the options. You can assign rights to the reports by users which the user allow to use it.
NOTE:
If using group to grant access rights over the users, you must revoke all the access rights to each users in Maintain Users.
To understand the logic, please refer to further details below Extra:  User Group and User Access Rights.
EXTRA: User Group and User Access Rights
- 1. The Group and user access rights logic:
Group 1 Group 2 User Result TRUE NULL TRUE TRUE TRUE NULL FALSE TRUE FALSE NULL TRUE TRUE FALSE NULL FALSE FALSE NULL TRUE TRUE TRUE NULL TRUE FALSE TRUE NULL FALSE TRUE TRUE NULL FALSE FALSE FALSE TRUE TRUE FALSE TRUE TRUE FALSE FALSE TRUE TRUE FALSE TRUE TRUE TRUE TRUE TRUE TRUE FALSE FALSE FALSE FALSE FALSE TRUE FALSE TRUE FALSE TRUE TRUE TRUE
- 2. For example,
Modules Group 1 Group 2 User Overall Rights GL √ x x √ Customer x √ x √ Supplier x x √ √ Sales √ √ x √ Purchase x √ √ √ Stock x x x x
- 3. From the above sample table, it means the overall rights will depends on either groups or user rights to the module.
