Introduction
Is External Shareware Program which Export Daily Sales for Sumsung System.
Document Type Export
- Sales Invoice
- Sales Cash Sales
- Sales Debit Note
- Sales Credit Note
- Stock Physical Worksheet
Limitation
- 1 Computer only can export 1 Company Database only
- 1 Item Code 1 Serial Number(Randomly select if more then 1)
Sumsung Export Specification
Export Program
- Version (1.0.0.0) - 09 Jul 2017
- Evaluation Limit : 30 Times Export
- http://www.estream.com.my/downloadfile/Fairy/SQLAccSumsungExport-setup.exe
- MD5 : 45D089291465C9DC894E85CE800D09FF
History New/Updates/Changes
--Build 0--
Todo
Settings
Firebird
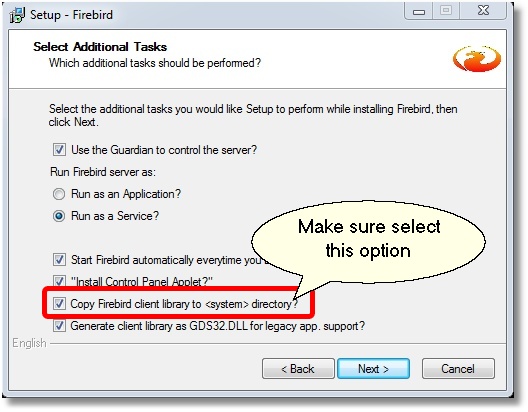
During Installation of Firebird make sure the option (see Below picture) is selected
Export Program
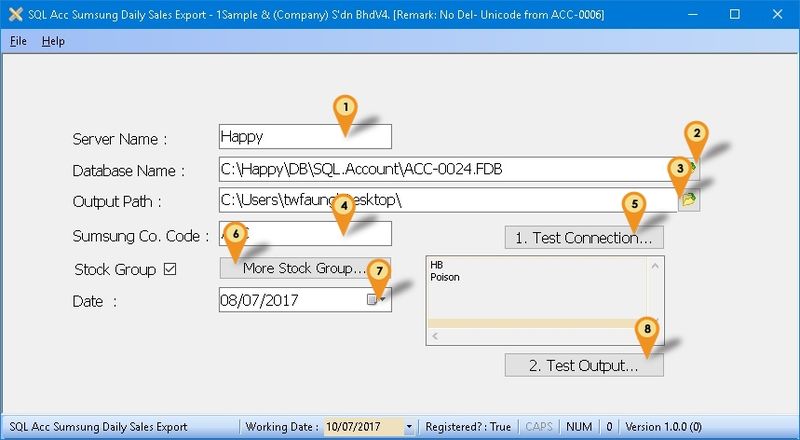
- 01. Enter the Server Name or IP Address
- 02. Click the button & select the Database to be export out.
- 03. Select the Output Path
- 04. Enter the Sumsung Co Code provided by Sumsung
- 05. Click Test Connection to make sure is successfully Connected.
- 06. Click More Stock Group... to select the Stock Group to export
- 07. Select the Date to export (ONLY for 1st time use)
- 08. Click Test Output... to testing export out.
Windows Schedule
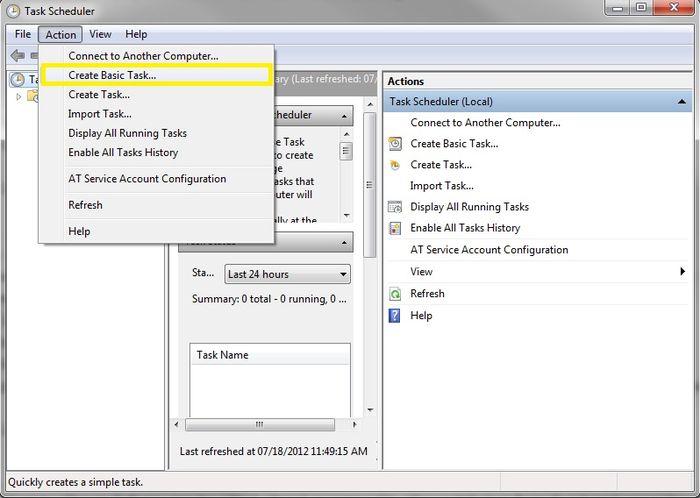
- 01. Open Windows Control Panel | Administrative Tools | Task Scheduler
- 02. Click Action | Create Basic Task...
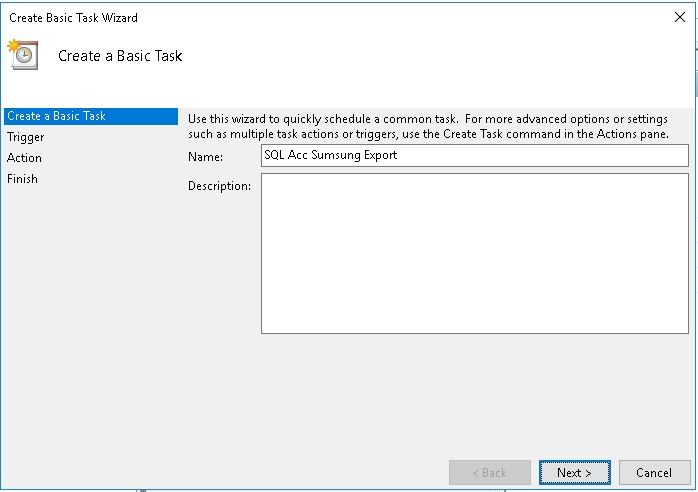
- 03. Enter Task Name (eg SQL Acc Sumsung Export) & Click Next
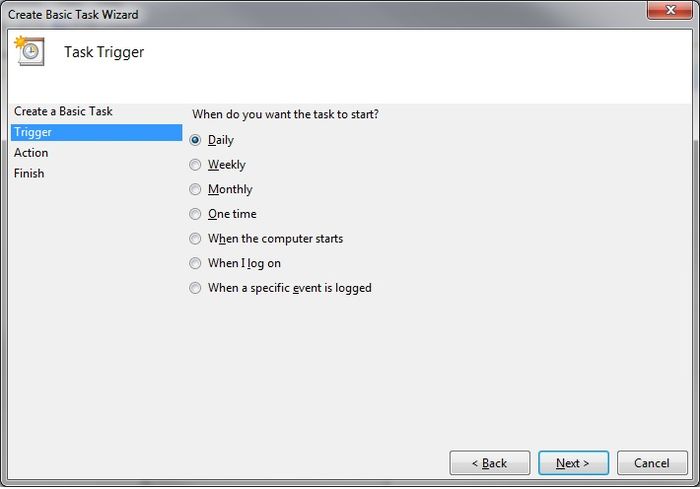
- 04. Select Daily & Click Next
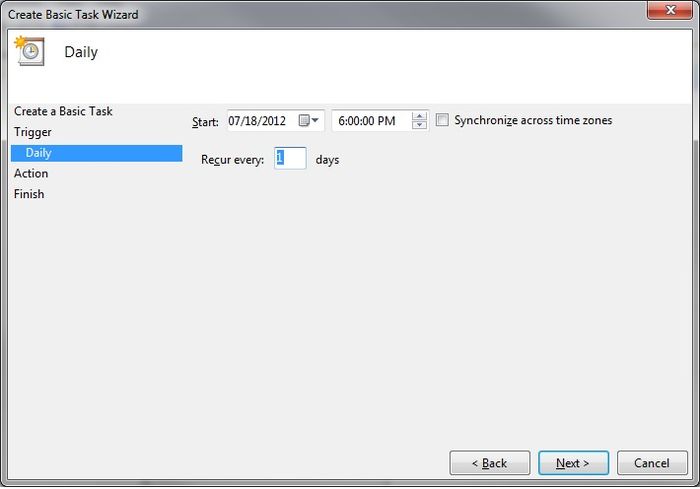
05. Set the Start Date & Time to Start
06. Set 1 for Recur every field & Click Next
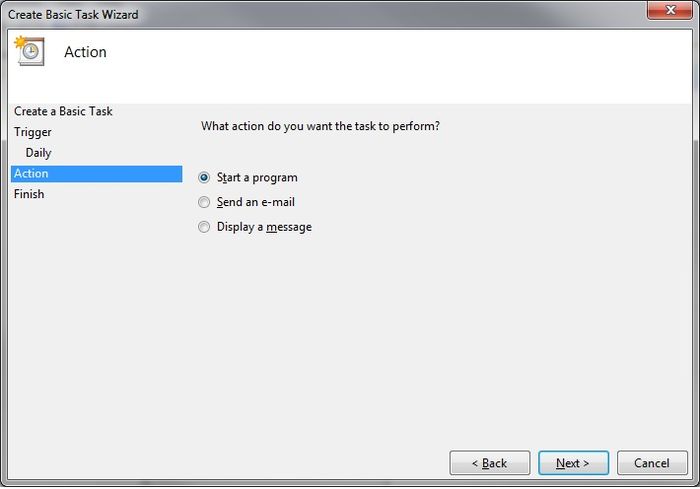
07. Select Start a program & Click Next
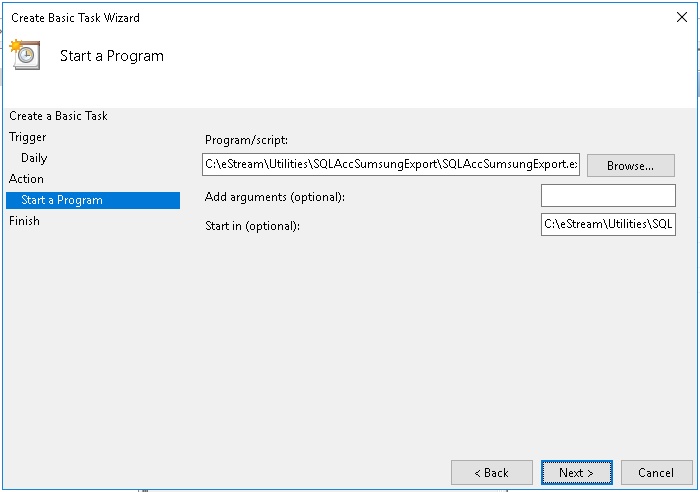
08. Click Browse button & find the SQLAccSumsungExportSchedule.exe (Default at C:\eStream\Utilities\SQLAccSumsungExport)
09. Set the Start in(optional) path to the Exe folder (eg. C:\eStream\Utilities\SQLAccSumsungExport) & Click Next
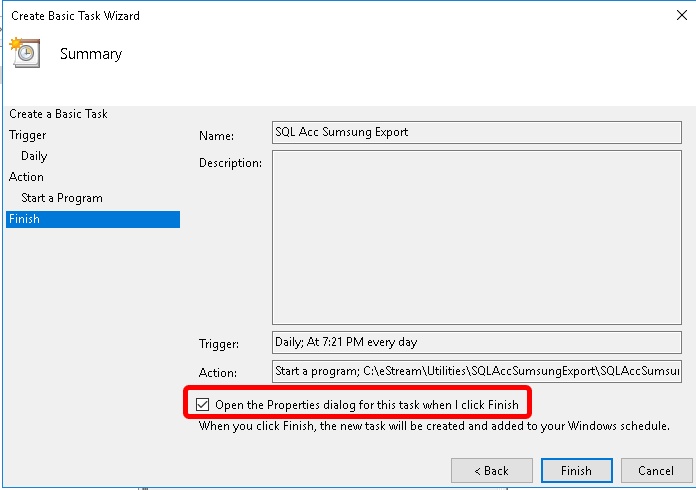
10. Tick the option Open the Properties dialog for this task when I click Finish
11. Click Finish
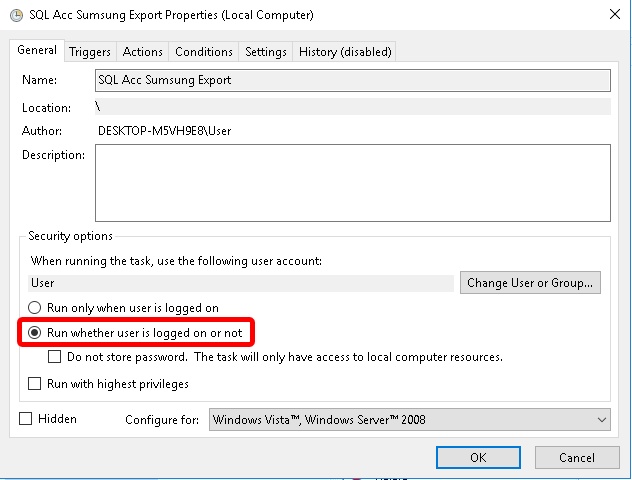
12. Select the option Run whether user is logged on or not
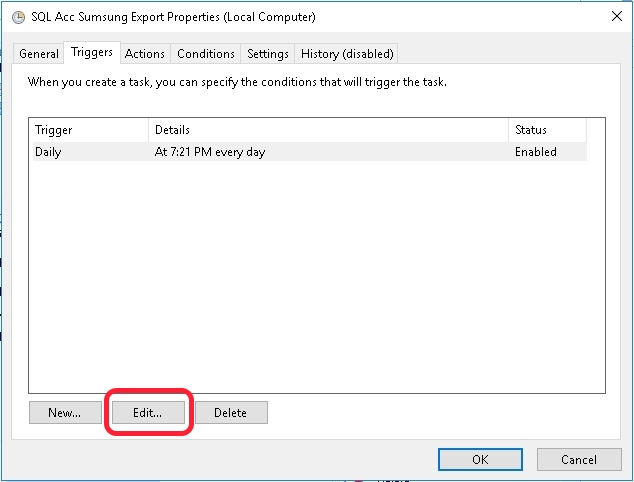
13. Click Triggers tab at top
14. Click Edit... button
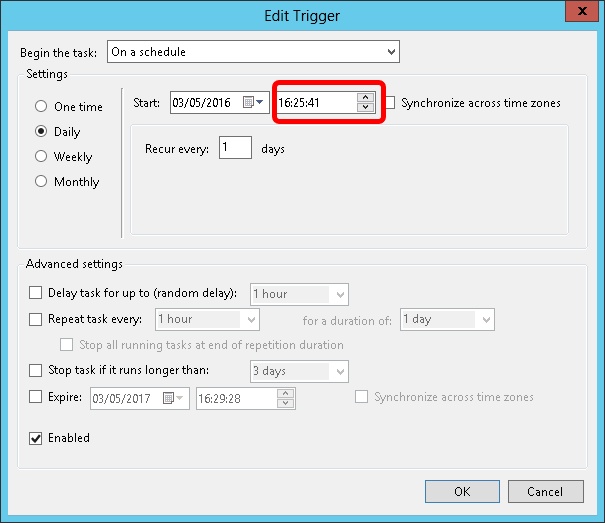
15. Change the time to run
16. Click OK 2 times
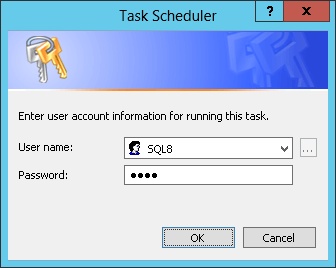
17. Enter the window User Name & Password
18. Click Ok
See also
- FAQ
- Others Customisation
