Menu: Tools | DIY | SQL Control Center...
Introduction
This Additional Module(DIY Fields Module) where user can self Create new User Define Field(s)
DIY Fields
- Available Data Field Type
- - Boolean
- - Currency
- - Date
- - Float
- - Integer
- - Memo
- - Picture
- - String
- For Explanation for Each Data Type may refer to http://www.w3schools.com/sql/sql_datatypes_general.asp
- ----------------------------------------------------------------------------------------------------------------------------------------------------
- ----------------------------------------------------------------------------------------------------------------------------------------------------
- User can create DIY Fields either at Header Fields or Item Fields
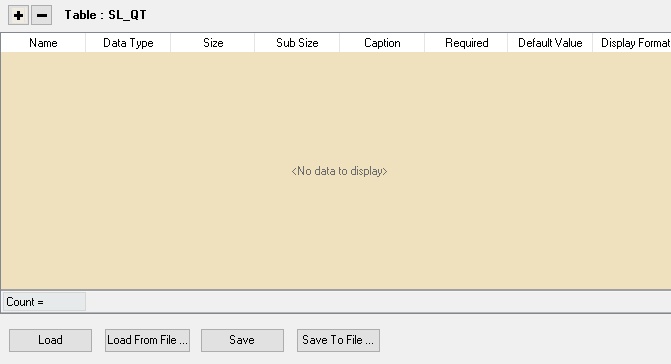
- In each Table had the below interface
Name Description Name - Field name
- Only Alphanumeric & no spacing
Data Type - Type of Field
Size - The Field Size
- Only applicable for Float, Integer & String Data Type
Sub Size - The Field Sub Size normally is the Decimal Point
- Only applicable for Float Data Type
Caption - Field name to be shown at user interface.
Required - To tell the system the current field MUST not empty
Default Value - Default Value to insert on New record
Display Format - Set Display format for Float, Currency & Integer Data Type
Load - Reload again the Script from the Database (Only for DIY Script)
Load From File - Load Script/Fields from the Text File.
- Be careful as system will delete the existing field before load the file to the system
Save - Save Current Script/Field
- Don't do Delete, Rename & Insert in same time (Only for DIY Fields)
Save To File - Save Current Script/Fields to Text File
+ Button - Add New Field
- Button - Delete Selected Field
Header Fields
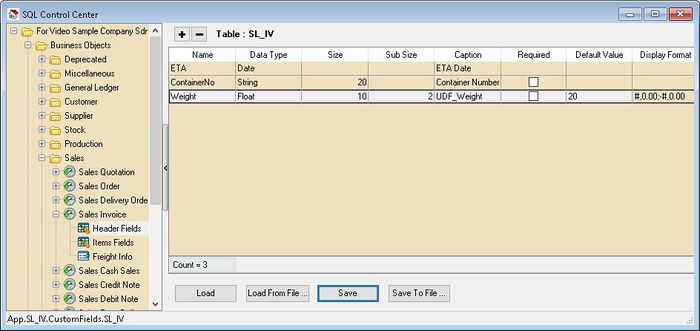
Below is the example for Sales Invoice
Add New Fields
- 01. At the left panel look for Sales Invoice | Header Fields
- 02. Click the + Button on top to add New fields as above picture
- 03. Click Save button
Design Layout
They are 2 ways to creating the Layout for new fields added.
Advance Form Design
This mode is only for the user who known how to use the Delphi.
Pros
- Freely adjust & place the component.
Cons
- Not Easy to design
- Not support Date & Picture Data Type
- 02. Select New Advance Form Design
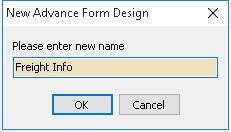
- 03. Enter the name (eg Freight Info) this will shown in the Sales Invoice Data Entry
- 04. Click OK
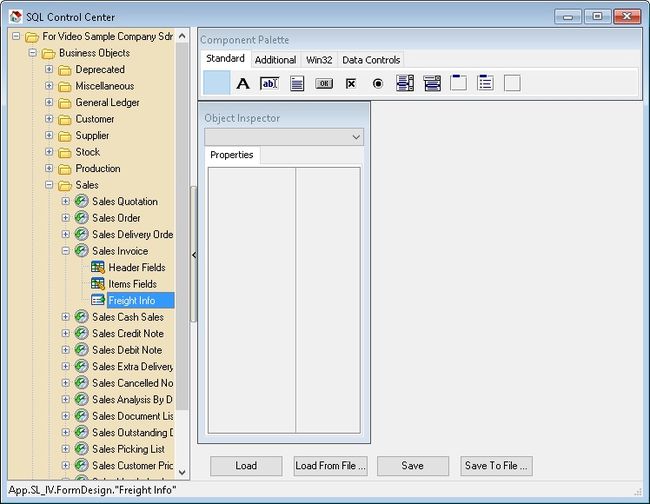
- 05. Click the Freight Info (name create at Step 3 above) on the left panel

- This Standard component is just for Fixed labeling or decoration
- The detail of each button can be refer to http://www.delphibasics.co.uk/Article.asp?Name=Standard
Component Purpose DBText Data-aware label that can display a field from a currently active record. DBEdit Data-aware edit box that can display or edit a field from a currently active record. DBMemo Data-aware memo box that can display or edit text BLOB data from a currently active record. DBImage Data-aware image box that can display, cut, or paste bitmapped BLOB images to and from a currently active record. DBListBox Data-aware list box that can display values from a column in a table. DBCheckBox Data-aware check box that can display or edit a Boolean data field from a currently active record. DBRichEdit Data-aware Rich Text Editor that can display or edit text BLOB data from a currently active record. cxDBSpinEdit Data-aware Edit box that can display or edit integer or Float data from a currently active record.
- ----------------------------------------------------------------------------------------------------------------------------------------------------
- ----------------------------------------------------------------------------------------------------------------------------------------------------
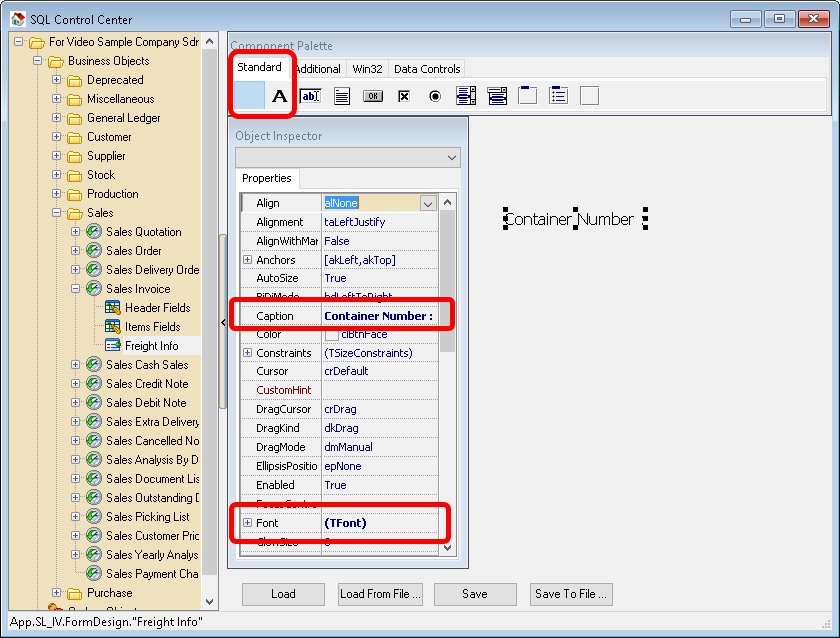
- 06. Click the Standard Tab & select Label button place on thee right panel
- 07. In the Object Inspector look for
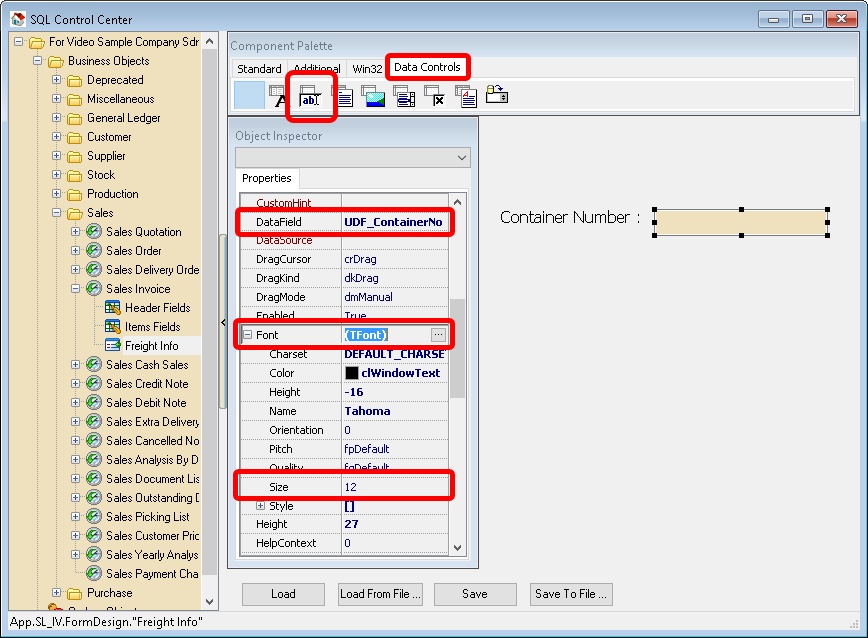
- 08. Click the Data Controls Tab & select DBEdit button place on thee right panel
- 09. In the Object Inspector look for
- 10. Continue repeat Step 6 till Step 9 for rest of the UDF field.
- 11. Click Save button after done.
Quick Form Design (Recommended)
This mode is for the user who don't known how to use the Delphi.
Pros
- Easy to Design
Cons
- Unable to freely adjust & place the component.
- Not support Rich Text Editor.
- 02. Select New Quick Form Design
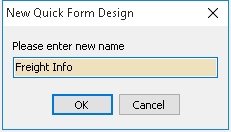
- 03. Enter the name (eg Freight Info) this will shown in the Sales Invoice Data Entry
- 04. Click OK
- 05. Click the Freight Info (name create at Step 3 above) on the left panel
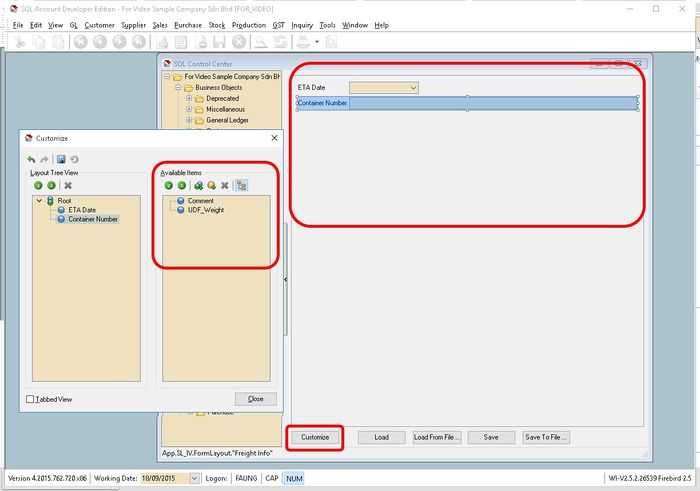
- 06. Click Customise button.
- 07. Drag the UDF Field from the Available Item dialog box & drop to Right Panel
- 08. Continue repeat Step 7 for rest of the UDF field.
- 09. Click Save button after done.
Item Fields
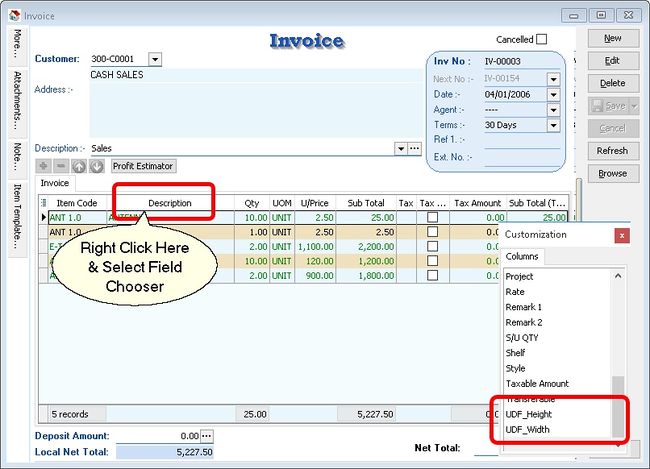
There is no layout need to be design for Item Field UDF. You can drag out all the UDF field in the Field Chooser in the data Entry
- 01. Drag the UDF field from the Customization Dialog
- 02. Drop it the column you wanted to shown (eg In between Description Column & Qty Column)

