Introduction
Branch Control Setting is done to prevent branch user from selecting Customer, Project, Stock Item or Location info that is not relevant to them.
Restricted for
- Branch user only allows to select their own customer
- Preset default Agent, Project, Item Code, Location code for each branch user
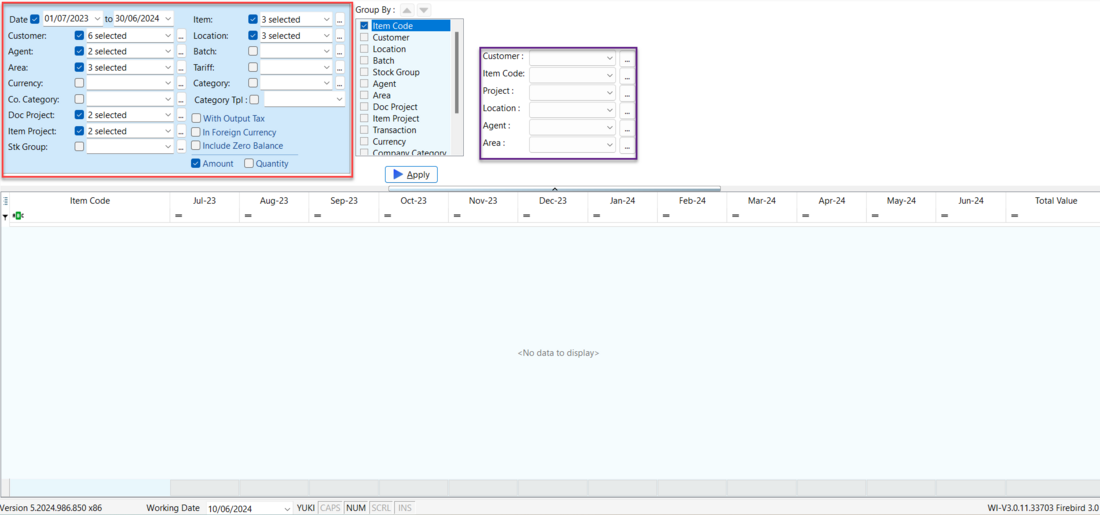
- Reports only shows transactions issued by the branch user
- Filter reports only using information assigned to the branch user
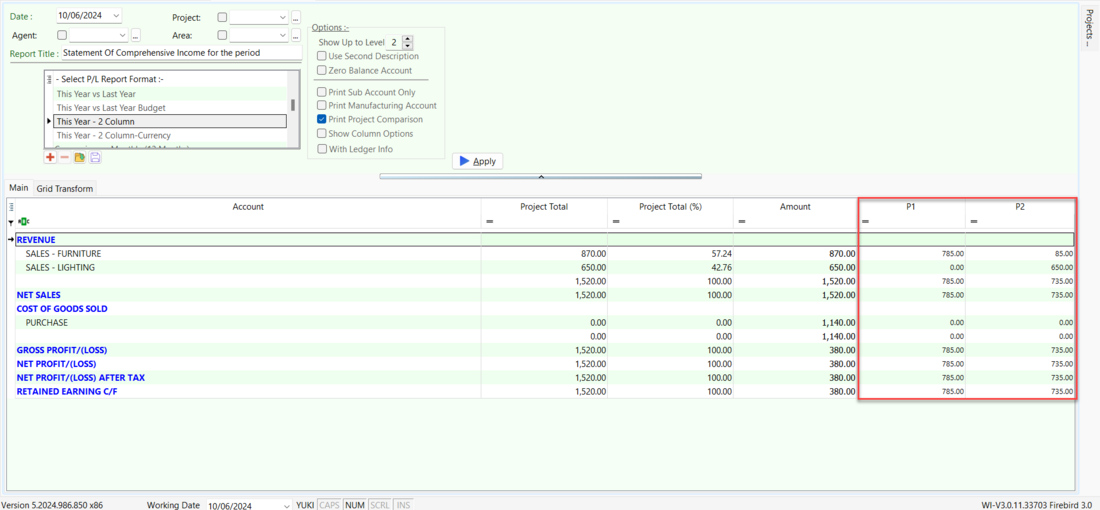
- Generate accurate P&L, Stock Balance Report for branches
Modules Require
- DIY Field
- DIY Script
What's Special on Branch Control Module?
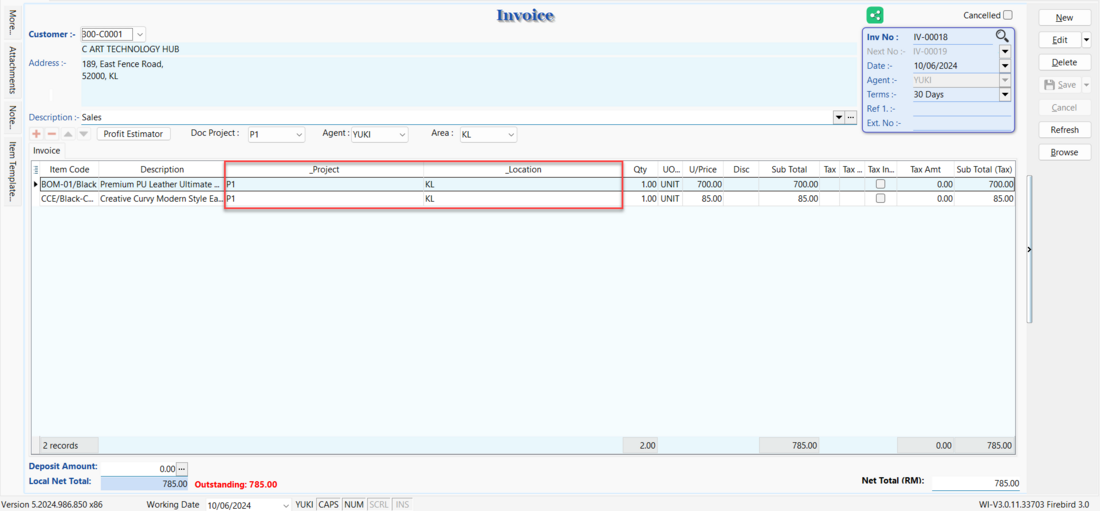
Project & Location
- Authorising each branch users to have the accessibility to their respective branch, SQL will automatically assign transactions created by the user to a specific branch to prevent human mistakes. Account entries, stock warehouse will automatically be posted to the appropriate branch.
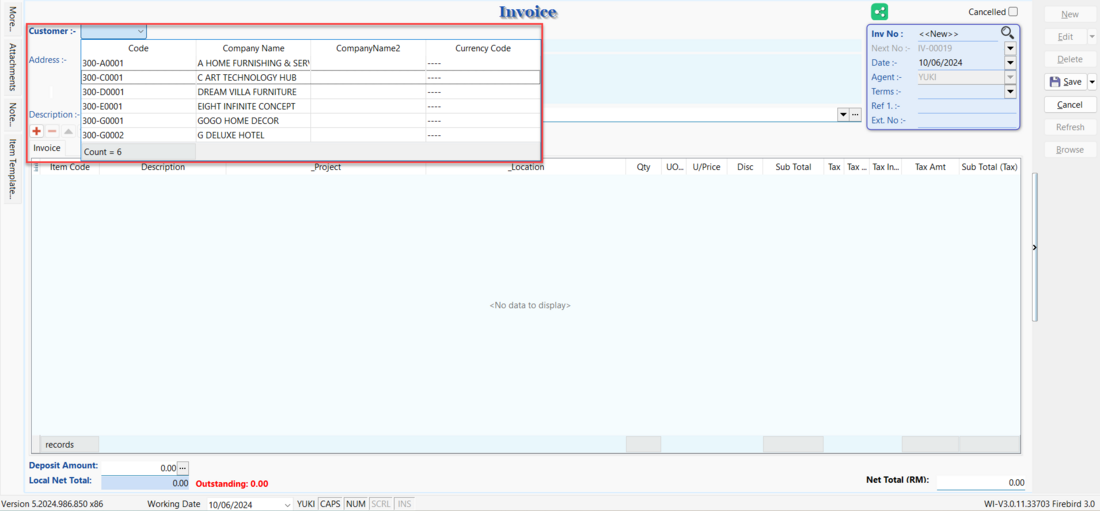
Customer List
- The user can only select/access the customer information for the own branch and is not permitted to post transactions for any other branch. You can avoid information being shared to other branches at data entry staff’s level.
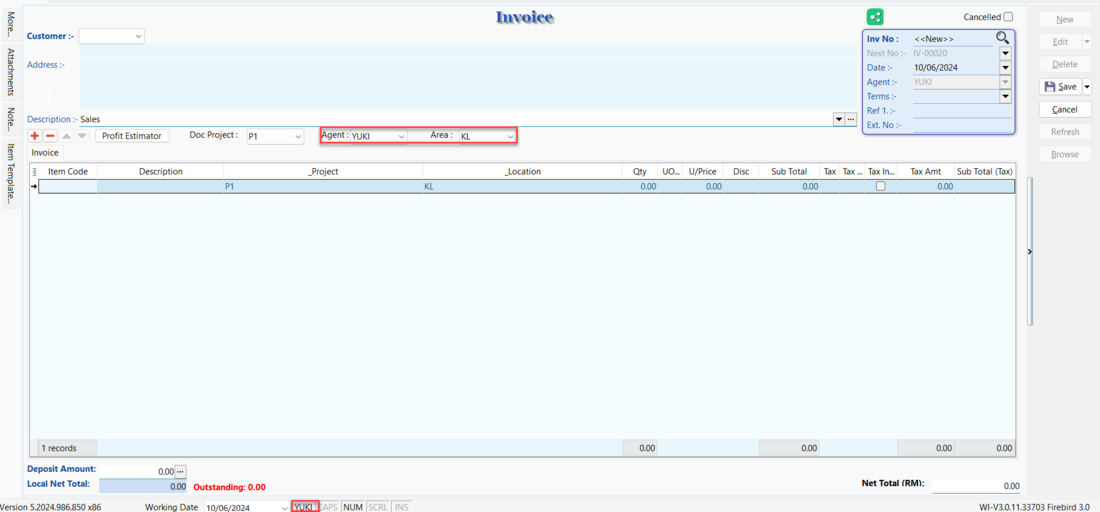
Agent / Area List
- Automatically set the default agent/area code based on user login to ease the user's instead of requiring manual selection.
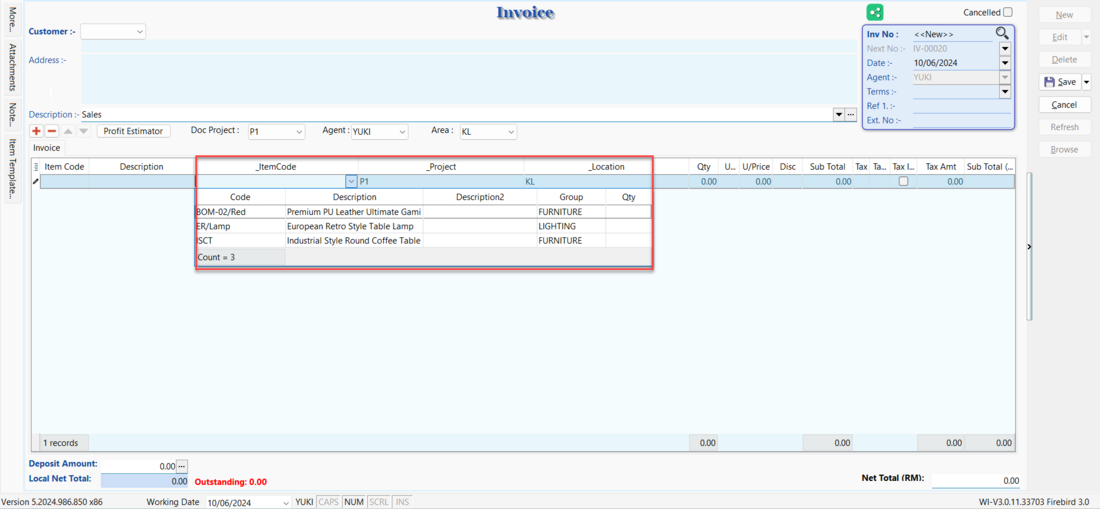
Stock Item List
- The user only able to select the list of item code belong to their branch.
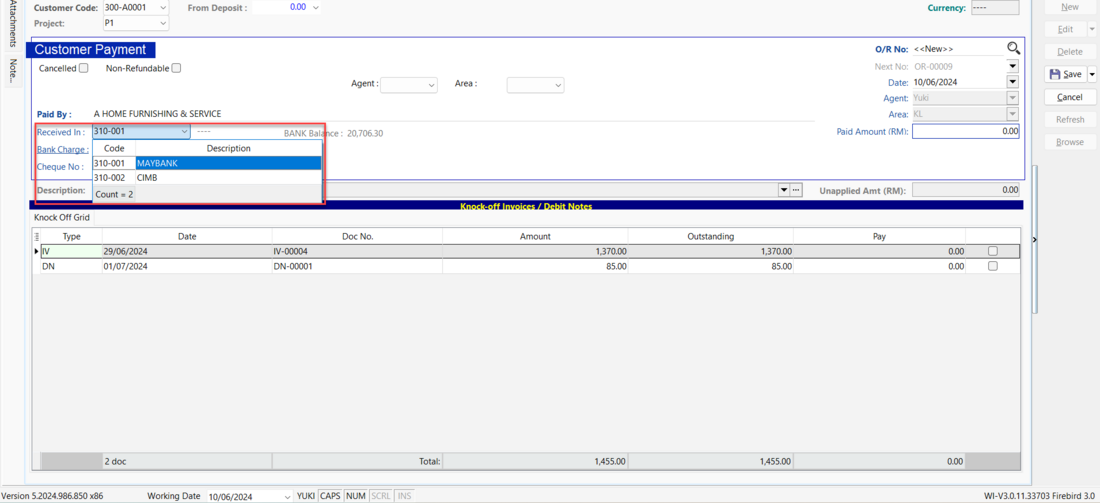
Payment Method
- Restrict payment methods for each branch to prevent human error and posting to unnecessary accounts.
Reporting
- Stay on top of your financial and operational transactions across all your branches with SQL. You can monitor all transactions happening in each branch. with this information, you can identify which branch is the most profitable and which branch that needs to monitor closely.
Profit & Loss Project
- By consolidating headquarter accounts with branch accounts, SQL allows for the viewing of consolidated balance sheets, profit and loss accounts by authorised users to evaluate the company’s overall performance. Bosses are able to drill down to the transactions of each branch individually.
One Time Setting
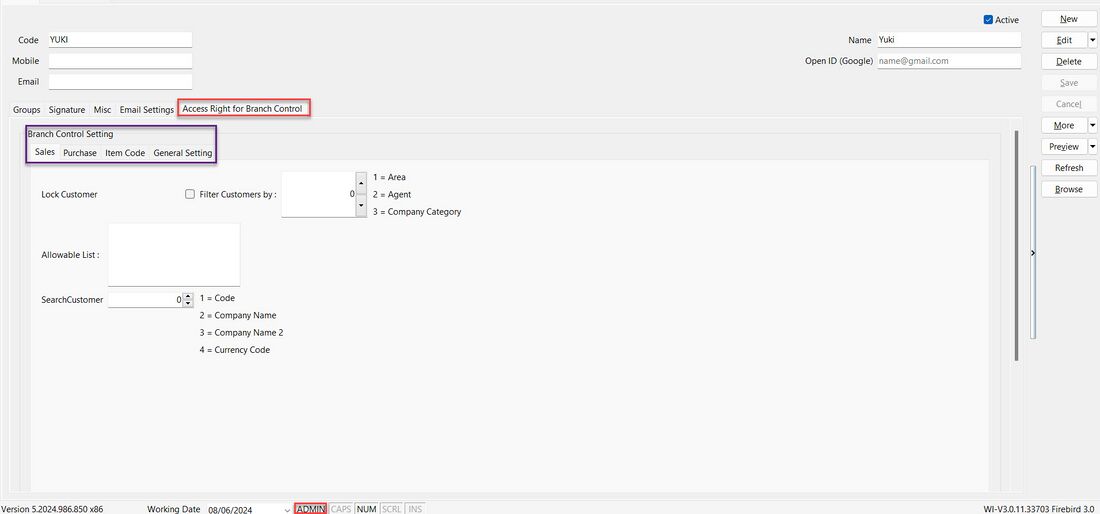
Menu: Tools | Maintain User...
- Here are the guidelines to set Branch Control Setting
- 01. Logon as ADMIN account
- 02. Choose for the sub account, e.g. Yuki agent account
- 03. Go to Access Right for Branch Control tab
- 04. Choose the Branch Control Settings tab you need
Sales
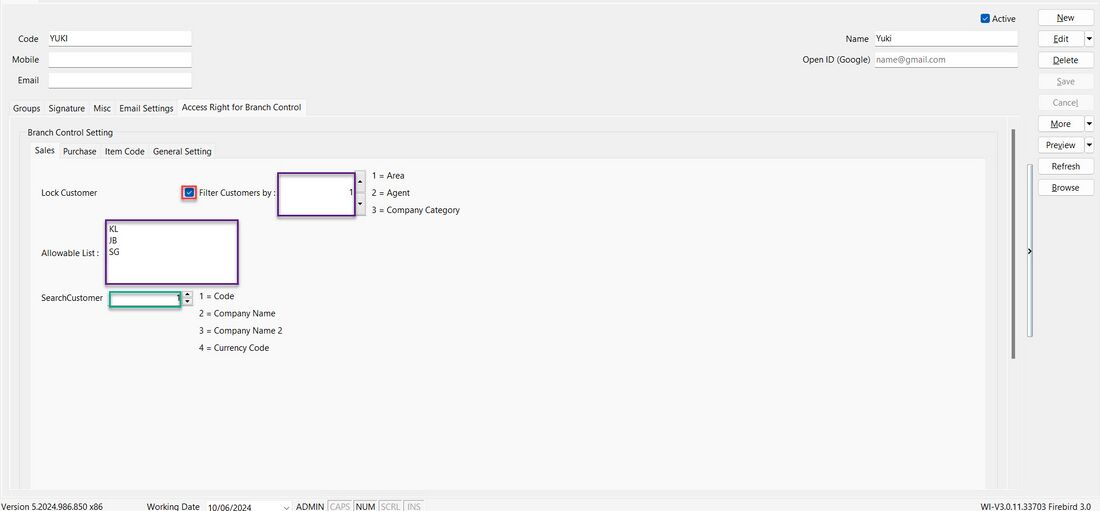
- 01. Tick Lock Customer
- 02. If want filter customers by
| Filter By | Number |
|---|---|
| Area | 1 |
| Agent | 2 |
| Company Category | 3 |
- The setting can only function within the range of 1 to 3.
- 03. Enter the Area code for Area in Allowable List, you are allow to enter more than 1 area codes.
- 04. If want search customer by
| Search By | Number |
|---|---|
| Code | 1 |
| Company Name | 2 |
| Company Name 2 | 3 |
| Currency Code | 4 |
- The setting can only function within the range of 1 to 4.
- E.g. Tick the Lock Customer Option and filtered customer list by area, enter as 1 in Filter Customers by. Enter Area code such as KL, JB, and SG in the allowable list column. User prefer to search for Customer Code, enter as 1 if would like to search Supplier Column.
Purchase
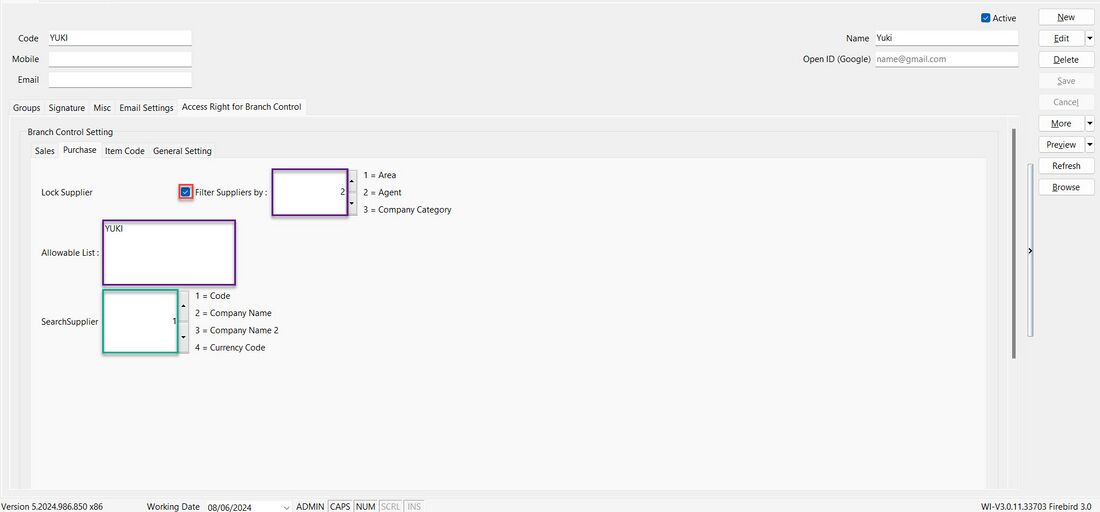
- 01. Tick Lock Supplier
- 02. If want filter suppliers by
| Filter By | Number |
|---|---|
| Area | 1 |
| Agent | 2 |
| Company Category | 3 |
- The setting can only function within the range of 1 to 3.
- 03. Enter the Agent code for Agent in Allowable List, you are allow to enter more than 1 agent codes.
- 04. If want search supplier by
| Search By | Number |
|---|---|
| Code | 1 |
| Company Name | 2 |
| Company Name 2 | 3 |
| Currency Code | 4 |
- The setting can only function within the range of 1 to 4.
- E.g. Tick the Lock Supplier option and filter supplier list by agent, enter as 2 in Filter Suppliers by. Enter Agent code, such as YUKI, in the allowable list column, and user prefer to search for supplier code, enter as 1 in Search Supplier Column.
Item Code
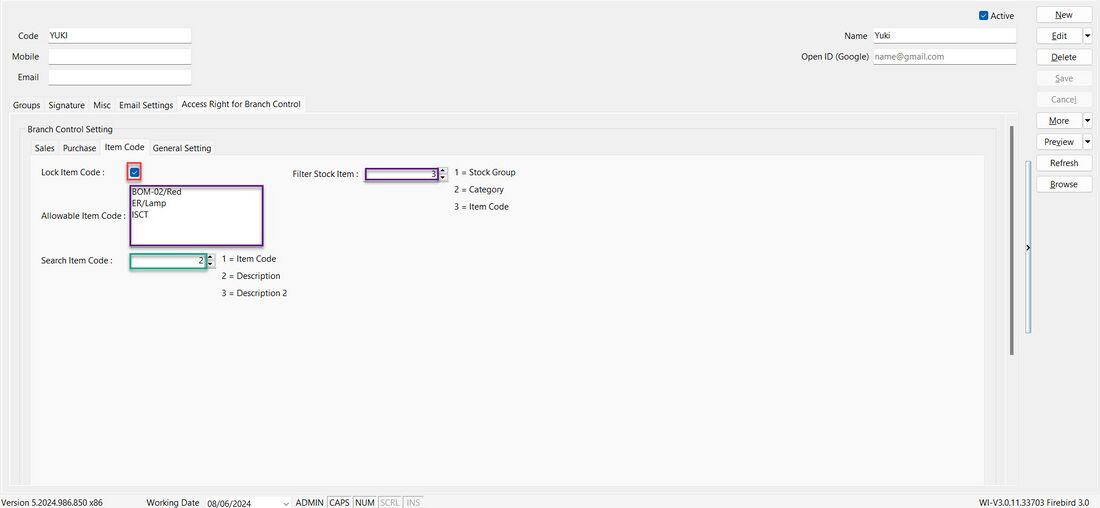
- 01. Tick Lock Item Code
- 02. If want filter stock item by
| Filter By | Number |
|---|---|
| Stock Group | 1 |
| Category | 2 |
| Item Code | 3 |
- The setting can only function within the range of 1 to 3.
- 03. Enter the item code for Item Code in Allowable Item Code, you are allow to enter more than 1 item codes.
- 04. If want search item code by
| Search By | Number |
|---|---|
| Item Code | 1 |
| Description | 2 |
| Description 2 | 3 |
- The setting can only function within the range of 1 to 3.
- E.g. Tick the Lock Item Code option and filter by item code. Enter item codes, such as BOM-02/Red, ER/Lamp, and ISCT, in the column, and search for item descriptions by item code.
General Setting
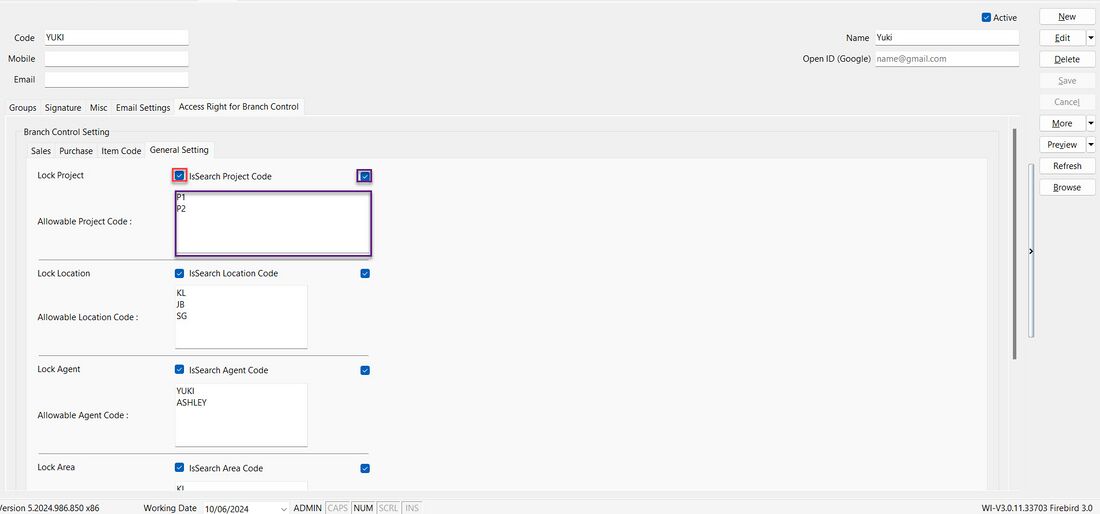
- 01. Tick Lock Project if you need to lock the project code
- 02. Tick if want search by Project Code, unticked will search by Project Description.
- 03. Enter the code for Project Code in Allowable ... columns, you are allow to enter more than 1 codes for Project Code
- 04. Repeat Step 1 to Step 3 for the remaining settings.
- E.g. Tick the Lock Project option. Tick IsSearchProjectCode to allow searching by project code, and enter project codes, such as P1 and P2, in the column for search.
