(→Cons) |
(→Cons) |
||
| Line 164: | Line 164: | ||
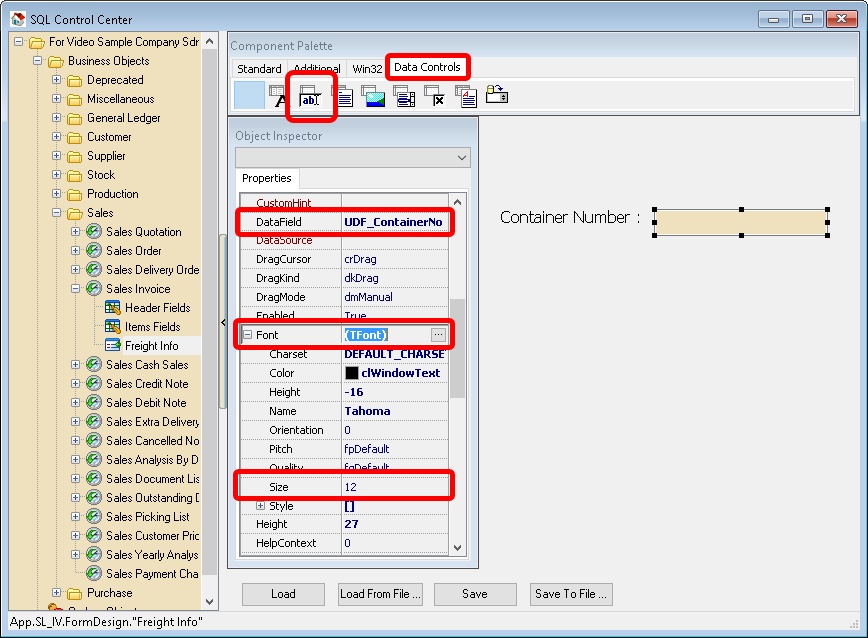
::* '''Font''' & set the '''Size''' to 12 or any size you prefer | ::* '''Font''' & set the '''Size''' to 12 or any size you prefer | ||
::[[File:DIYField-09.jpg]] | ::[[File:DIYField-09.jpg]] | ||
:10. Continue repeat Step 6 till Step 9 for rest of the UDF field. | |||
:11. Click Save. | |||
=====Quick Form Design (Recommended)===== | =====Quick Form Design (Recommended)===== | ||
Revision as of 09:54, 18 September 2015
Menu: Tools | DIY | SQL Control Center...
Introduction
This Additional Module where user can self
- Create new field (DIY Fields Module)
- Modified the SQL Accounting (DIY Script Module)
DIY Fields
- Available Data Field Type
- - Boolean
- - Currency
- - Date
- - Float
- - Integer
- - Memo
- - Picture
- - String
- For Explanation for Each Data Type may refer to http://www.w3schools.com/sql/sql_datatypes_general.asp
- ----------------------------------------------------------------------------------------------------------------------------------------------------
- ----------------------------------------------------------------------------------------------------------------------------------------------------
- User can create DIY Fields either at Header Fields or Item Fields
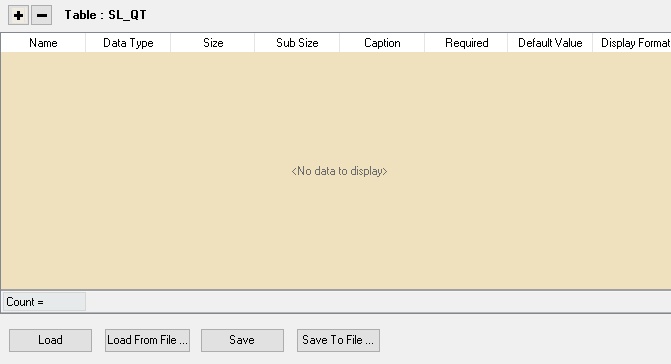
- In each Table had the below interface
Name Description Name - Field name
- Only Alphanumeric & no spacing
Data Type - Type of Field
Size - The Field Size
- Only applicable for Float, Integer & String Data Type
Sub Size - The Field Sub Size normally is the Decimal Point
- Only applicable for Float Data Type
Caption - Field name to be shown at user interface.
Required - To tell the system the current field MUST not empty
Default Value - Default Value to insert on New record
Display Format - Set Display format for Float, Currency & Integer Data Type
Load - Reload again the Script from the Database (Only for DIY Script)
Load From File - Load Script/Fields from the Text File.
- Be careful as system will delete the existing field before load the file to the system
Save - Save Current Script/Field
- Don't do Delete, Rename & Insert in same time (Only for DIY Fields)
Save To File - Save Current Script/Fields to Text File
+ Button - Add New Field
- Button - Delete Selected Field
Header Fields
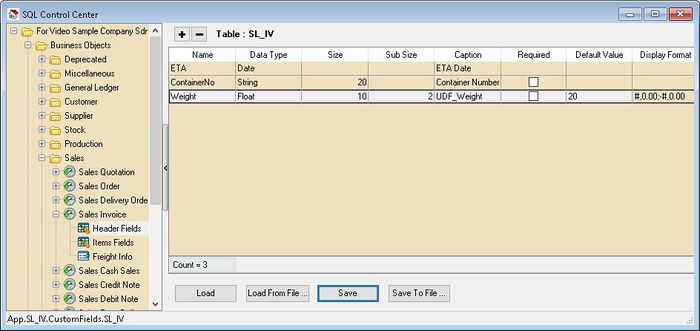
Below is the example for Sales Invoice
Add New Fields
- At the left panel look for Sales Invoice | Header Fields
- Click the + Button on top to add New fields as above picture
- Click Save button
Design Layout
They are 2 ways to creating the Layout for new fields added.
- Right Click the Sales Invoice
Advance Form Design
This mode is only for the user who known how to use the Delphi.
Pros
- Freely adjust & place the component.
Cons
- Not Easy to design
- Not support Date Data Type
- 2. Select New Advance Form Design
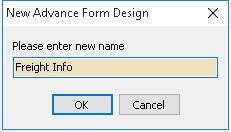
- 3. Enter the name (eg Freight Info) this will shown in the Sales Invoice Data Entry
- 4. Click OK
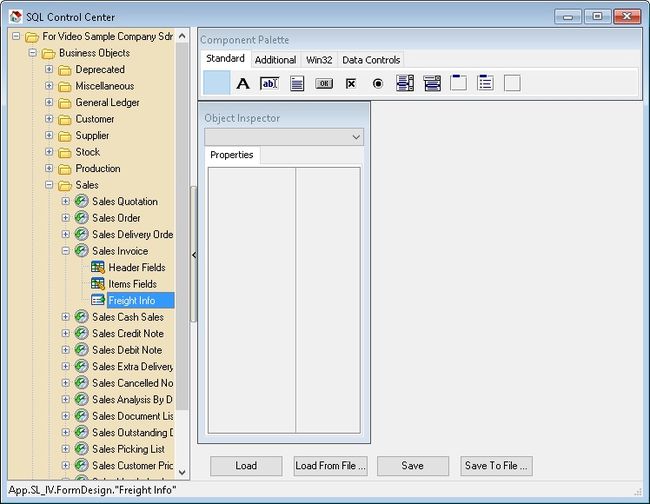
- 5. Click the Freight Info (name create at Step 3 above) on the left panel

- This Standard component is just for Fixed labeling or decoration
- The detail of each button can be refer to http://www.delphibasics.co.uk/Article.asp?Name=Standard
Component Purpose DBText Data-aware label that can display a field from a currently active record. DBEdit Data-aware edit box that can display or edit a field from a currently active record. DBMemo Data-aware memo box that can display or edit text BLOB data from a currently active record. DBImage Data-aware image box that can display, cut, or paste bitmapped BLOB images to and from a currently active record. DBListBox Data-aware list box that can display values from a column in a table. DBCheckBox Data-aware check box that can display or edit a Boolean data field from a currently active record. DBRichEdit Data-aware Rich Text Editor that can display or edit text BLOB data from a currently active record. cxDBSpinEdit Data-aware Edit box that can display or edit integer or Float data from a currently active record.
- ----------------------------------------------------------------------------------------------------------------------------------------------------
- ----------------------------------------------------------------------------------------------------------------------------------------------------
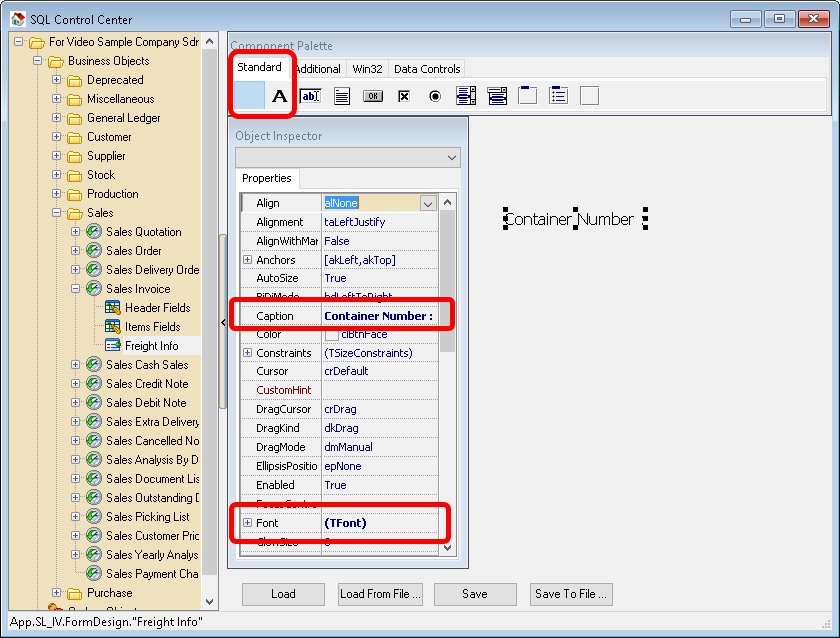
- 6. Click the Standard Tab & select Label button place on thee right panel
- 7. In the Object Inspector look for
- 8. Click the Data Controls Tab & select DBEdit button place on thee right panel
- 9. In the Object Inspector look for
- 10. Continue repeat Step 6 till Step 9 for rest of the UDF field.
- 11. Click Save.
Quick Form Design (Recommended)
Pros
- Easy to Design
Cons
- Unable to freely adjust & place the component.
- Not support Rich Text Editor.
- 2. Select New Quick Form Design

