(→Steps) |
(→Steps) |
||
| Line 96: | Line 96: | ||
<div style="float: right;"> [[#top|[top]]]</div> | <div style="float: right;"> [[#top|[top]]]</div> | ||
==See also== | |||
* Others [[Customisation]] | |||
Revision as of 04:20, 22 June 2017
Introduction
Is an External Utilities for other Application to Access Firebird Database
Pros
- Can direct Retrieve/Get Information From Connected Database.
Cons
- User might lost concurrent license (i.e. need to buy double)
- Might corrupt the database if not careful
- Setting need to reset if user change the database file name
- Setting need to reset if estream change firebird version or table/field name
|
Requirement
- Firebird Server 32 bits
- SQL Product
Program
Setup
- 01. Open Control Panel.
- 02. Double Click Administrative Tools | ODBC Data Sources (32-bit)
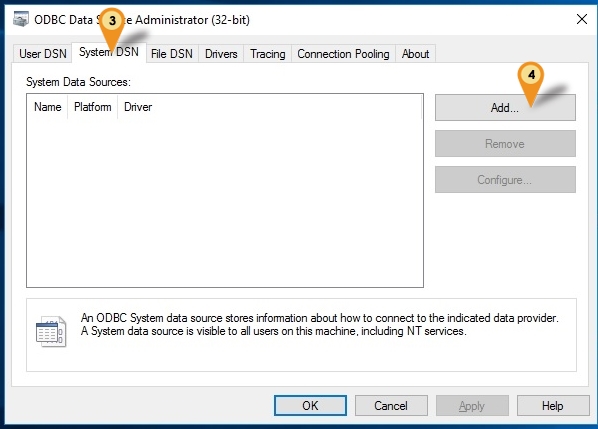
- 03. Click on System DSN tab
- 04. Click Add button.
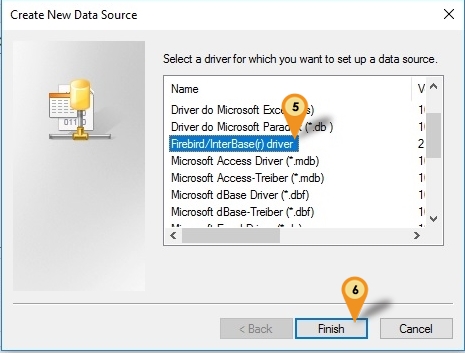
- 05. Select Firebird/InterBase(r) Driver
- 06. Click Finish button.
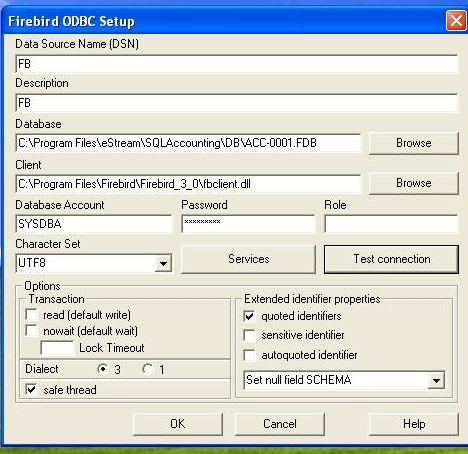
- 07. Under Firebird ODBC Setup, define the following info only and the rest by default :
| Field Name | Description |
|---|---|
| Data Source Name (DSN) | Can be any Name (eg. FB) |
| Description | Can be any Description (eg. FB) |
| Database | The Firebird FDB file path |
| Client |
|
| Database Account | Firebird user name (Default is SYSDBA) |
| Password | Firebird password (Default is masterkey) |
| Character Set | Set to UTF8 (For FB3.0 & above) |
| Dialect | Set to 3 |
Example Access From Microsoft Excel
Below example is using Microsoft Excel 2016 to get Firebird Data using ODBC
Steps
- 01. Create New Worksheet
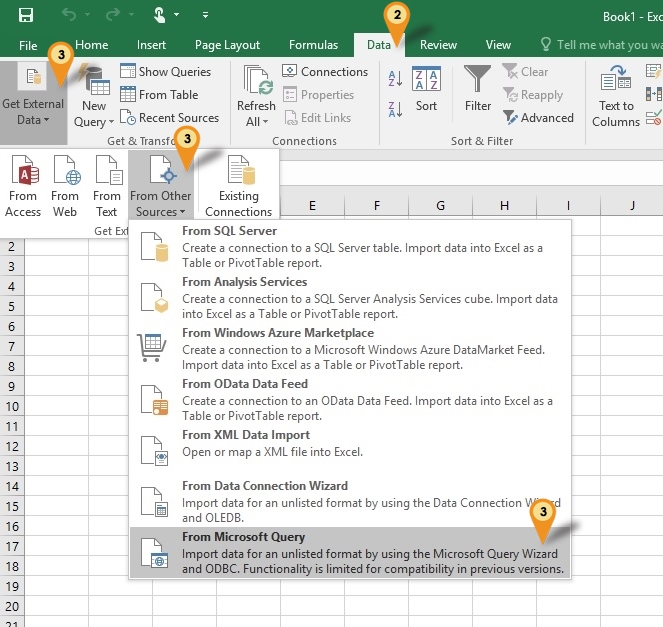
- 02. Click Data Tab
- 03. Clcik Get External Data | From Other Source | From Microsoft Query
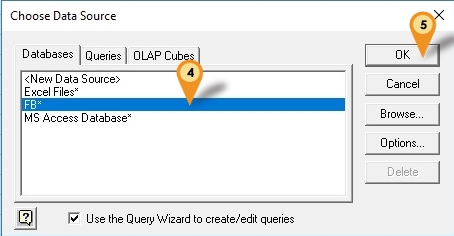
- 04. Select FB* (The Data Source Name entered in ODBC)
- 05. Click OK button
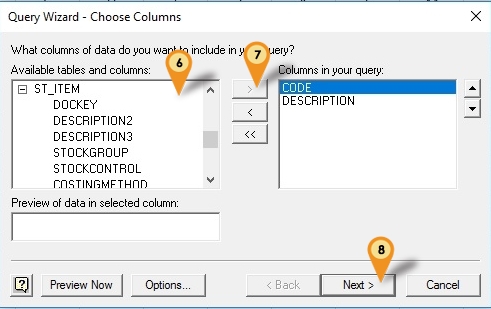
- 06. Select the table at the Available tables and columns field
- 07. Click the > button to select the Columns
- 08. Click Next button till you see below dialog
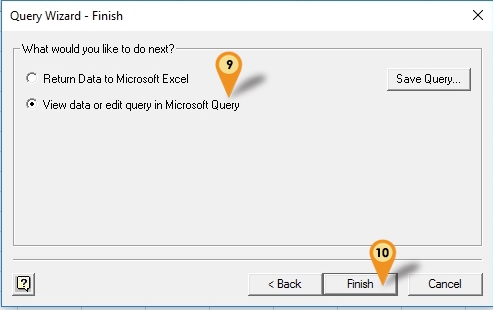
- 09. Select View data or edit query in Microsoft Query option
- 10. Click Finish button
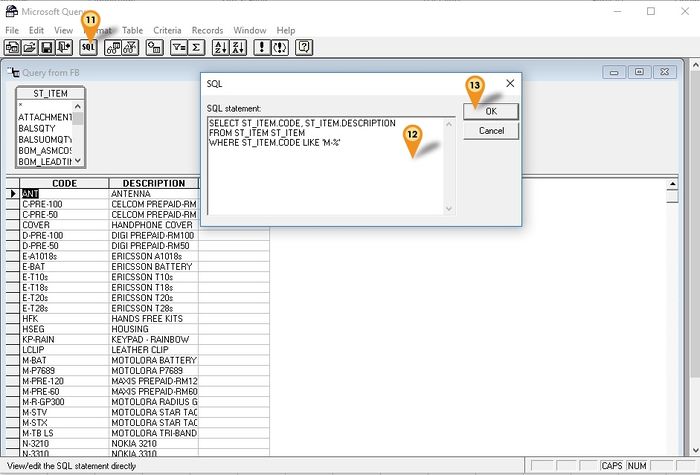
- 11. Click SQL button to edit your Query
- 12. Edit the Query Statement here
- 13. Click OK button when done
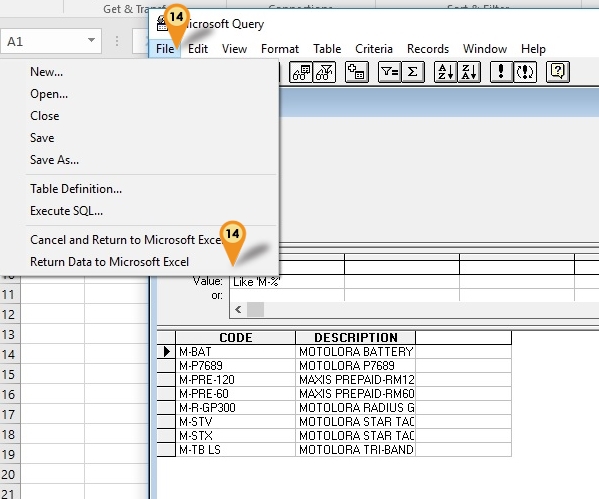
- 14. Click File | Return Data to Microsoft Excel
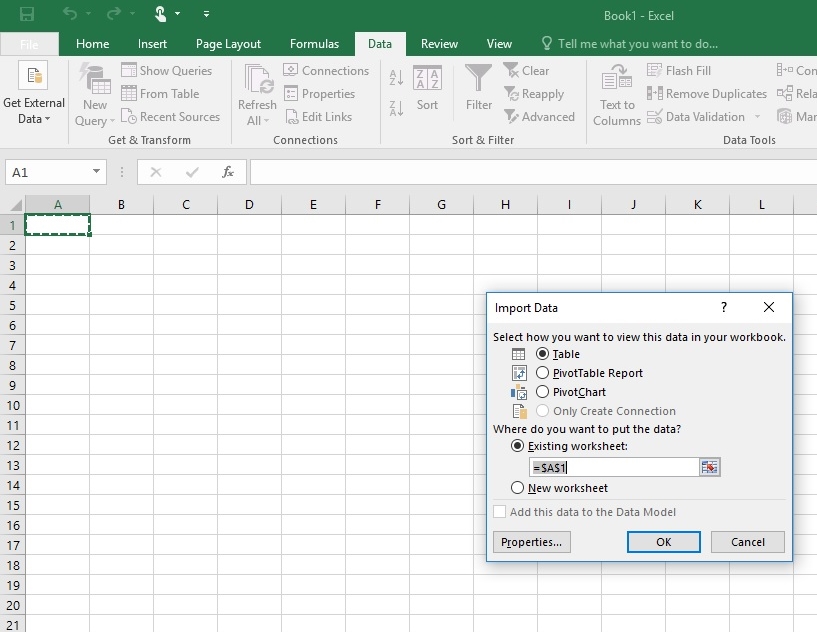
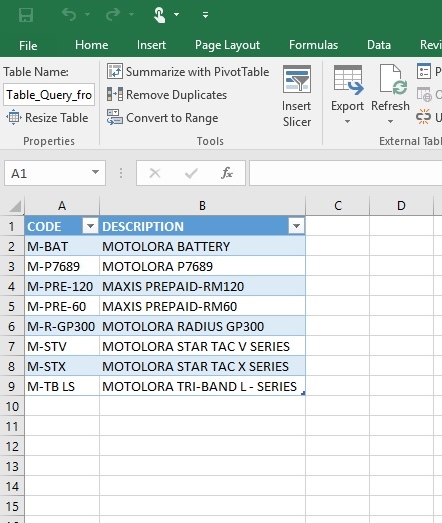
- 15. Click Ok button
See also
- Others Customisation

