| Line 75: | Line 75: | ||
::[[File:SQL_View_11.jpg |900px]] | ::[[File:SQL_View_11.jpg |900px]] | ||
<br /> | <br /> | ||
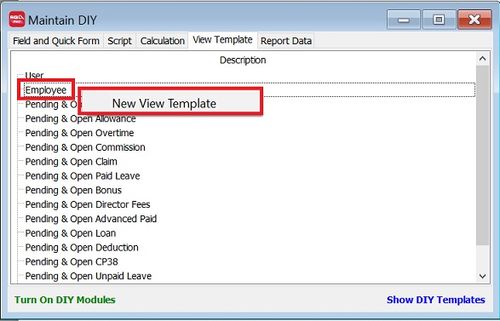
: | :1. At Maintain DIY, click on View Template tab. | ||
:2. Double click on the existing Template View (eg. EMPLOYEE-KL). | |||
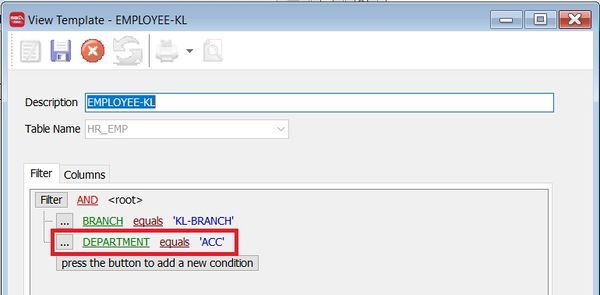
:3. Click to '''press the button to add a new condition''' to add new condition. See the screenshot below. | |||
::[[File:SQL_View_10.jpg |600px]] | ::[[File:SQL_View_10.jpg |600px]] | ||
<br /> | <br /> | ||
Latest revision as of 10:49, 25 September 2019
Introduction
- SQL View is one of the powerful advance security module to SQL Payroll to limit your employees access and process payroll by designated grouping.
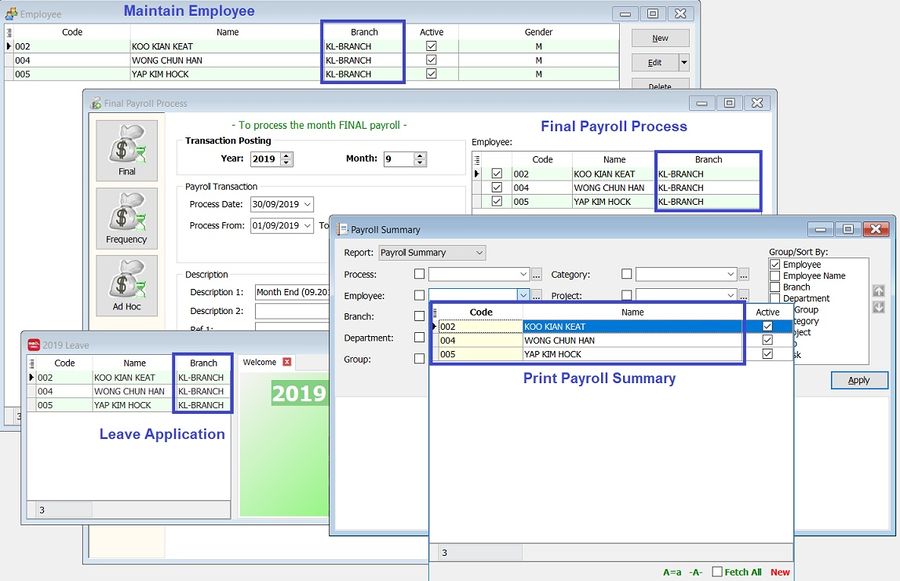
- For example, KL HR manager can view and process payroll for the KL branch employees only. However, the Penang HR staff will allow to view and process payroll for Penang branch employees only.
1. All branches
2. Branch KL (KL HR Manager View)
3. Branch Penang (Penang HR Staff View)
SQL View
Menu: Tools | DIY | Maintain DIY...
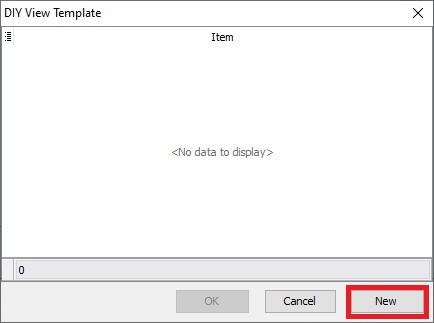
New View Template
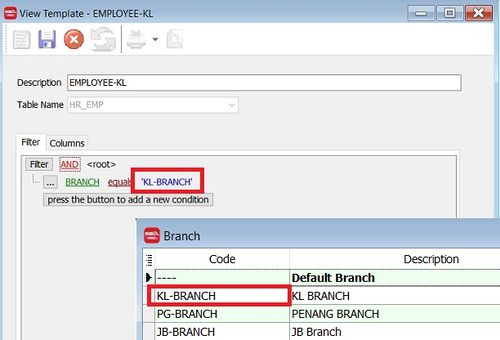
- 4. At View Template form, key-in the description (eg. EMPLOYEE-KL).
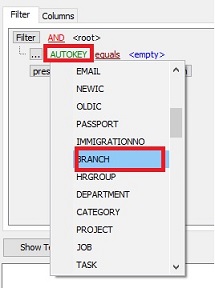
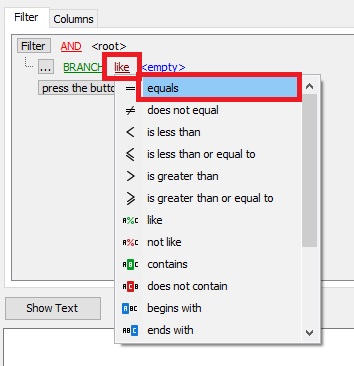
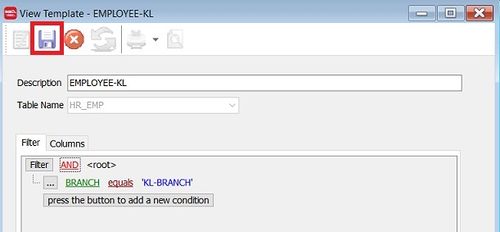
- 5. At Filter tab, add the condition by press the button to add a new condition.
TIPS:
Change to DEPARTMENT if the view control by Department.
NOTE:
Remember to put a quoted to branch code, eg. 'KL-Branch'.
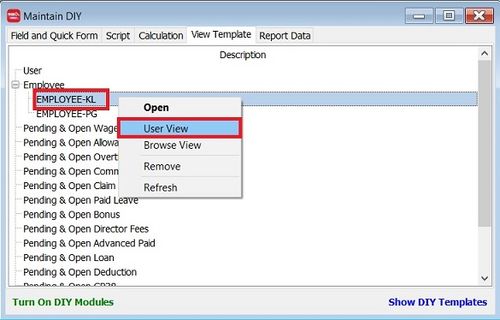
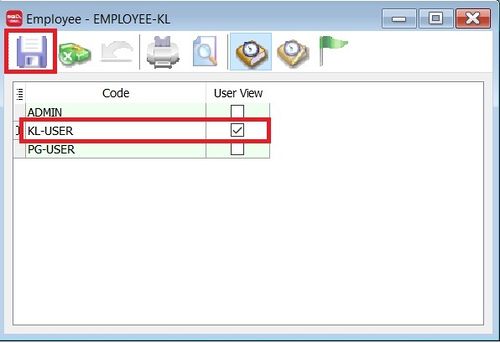
User View
- After the above settings, KL-USER can view, process payroll and print reports for KL branch employees only.
User View - More than single condition
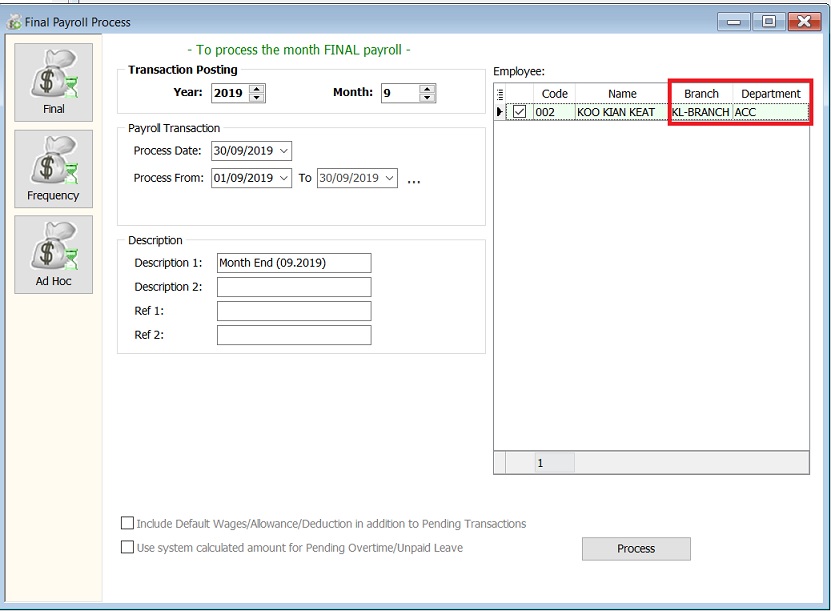
- For example, KL Accountant will process payroll for employees from KL Branch and Accounts department only.
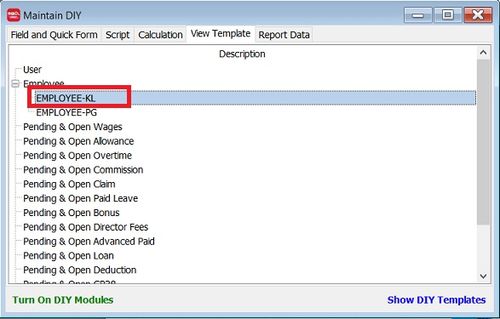
- 1. At Maintain DIY, click on View Template tab.
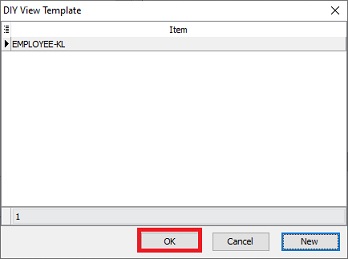
- 2. Double click on the existing Template View (eg. EMPLOYEE-KL).
- 3. Click to press the button to add a new condition to add new condition. See the screenshot below.


