No edit summary |
No edit summary |
||
| (11 intermediate revisions by the same user not shown) | |||
| Line 2: | Line 2: | ||
Standalone is the License for Single User. | Standalone is the License for Single User. | ||
==Setup== | ==Setup== | ||
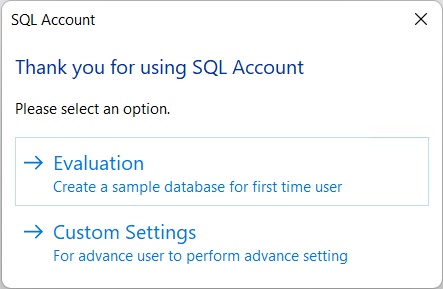
:01. Double click the '''SQL Product''' icon at the desktop and the below dialog will appear. <br> | |||
[[File:Installation.Standalone01.jpg|center]] | |||
:02. Click on '''Custom Settings''' button. | |||
[[File:Installation.Standalone02.jpg|center]] | |||
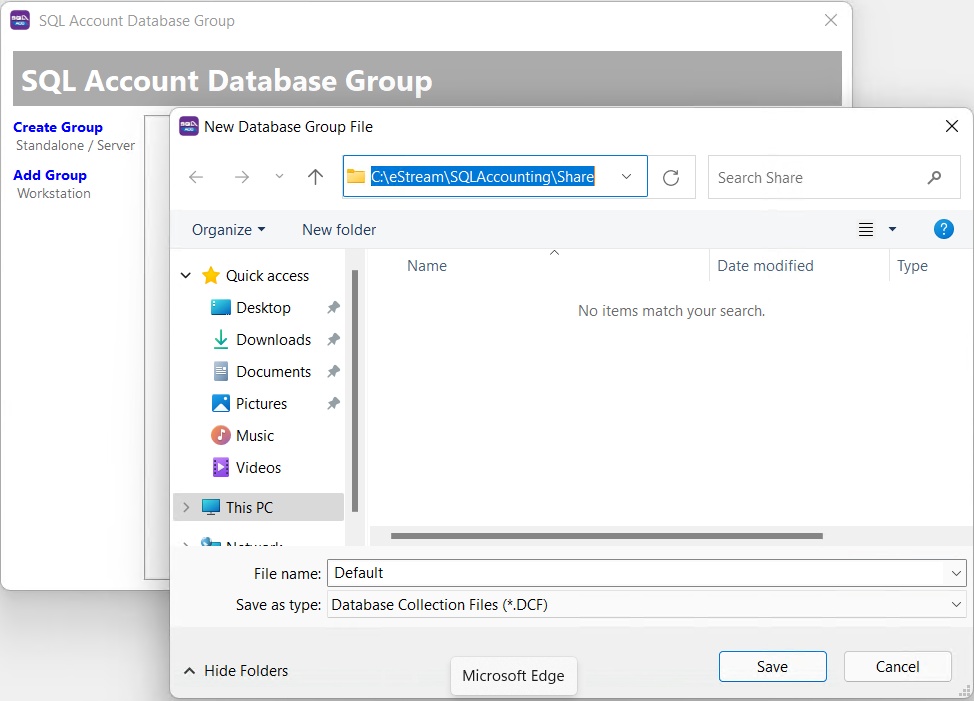
:03. Click '''Create Group''' | |||
:04. Select the Location where you wanted to save for the DCF File. | |||
Default is at C:\estream\SQLAccounting\Share | |||
[[File:Installation.Standalone03.jpg|center]] | |||
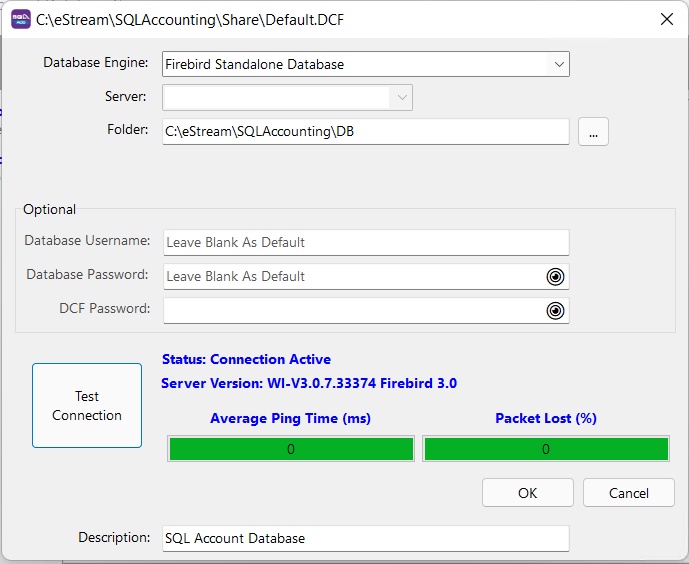
:05. Select <span style="color:#0000ff">Firebird Standalone Database</span> at Database Engine | |||
:06. Select the Database Folder & click Ok. | |||
Default is at ''C:\estream\SQLAccounting\DB'' | Default is at ''C:\estream\SQLAccounting\DB'' | ||
::[[File:Installation. | :07. Click Test Connection to make sure is <span style="color:#0000ff">Blue</span> Status | ||
:08. Click OK | |||
[[File:Installation.Standalone04.jpg|center]] | |||
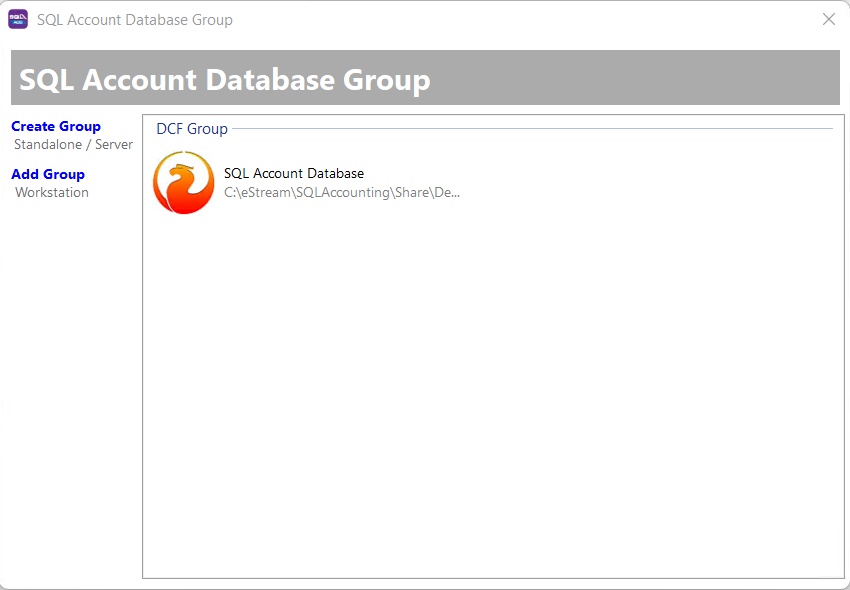
:09. Double Click the Firebird Icon. | |||
{| class="wikitable" style="margin: 1em auto 1em auto;" | |||
|- | |- | ||
! Field Name !! Properties | ! Field Name !! Properties | ||
|- | |- | ||
| Create Group || Create New DCF file. Normally use at Server. | | Create Group || Create New DCF file. Normally use at Server or Standalone use. | ||
|- | |- | ||
| Add Group || Add Existing DCF file. Normally use at workstation. | | Add Group || Add Existing DCF file. Normally use at workstation. | ||
|} | |} | ||
: | {| style="margin: 1em auto 1em auto;" | ||
|- | |||
| | |||
---------------------------------------------------------------------------------------------------------------------------------------------------- | |||
{| | |||
|- | |- | ||
| [[File:Template.Tips-01.jpg|60px]]|| Right Click the Firebird Icon & select | | [[File:Template.Tips-01.jpg|60px]]|| Right Click the Firebird Icon & select | ||
| Line 29: | Line 37: | ||
* '''Create Desktop Shortcut''' to create a shortcut icon for each DCF file. | * '''Create Desktop Shortcut''' to create a shortcut icon for each DCF file. | ||
|} | |} | ||
---------------------------------------------------------------------------------------------------------------------------------------------------- | |||
|} | |||
:10. Click New Database On left Panel. | |||
[[File:Installation.Standalone05.jpg|center]] | |||
{| class="wikitable" style="margin: 1em auto 1em auto;" | |||
|- | |- | ||
! Field Name !! Properties | ! Field Name !! Properties | ||
| Line 50: | Line 59: | ||
|} | |} | ||
: | {| style="margin: 1em auto 1em auto;" | ||
|- | |||
| | |||
---------------------------------------------------------------------------------------------------------------------------------------------------- | |||
{| | |||
|- | |- | ||
| [[File:Template.Tips-01.jpg|60px]]|| You can use '''Drag & Drop''' from windows explorer to restore the database. | | [[File:Template.Tips-01.jpg|60px]]|| You can use '''Drag & Drop''' from windows explorer to restore the database. | ||
|} | |} | ||
---------------------------------------------------------------------------------------------------------------------------------------------------- | |||
|} | |||
:11. Enter the Company Name & Click OK. | |||
[[File:Installation.Standalone06.jpg|center]] | |||
{| class="wikitable" style="margin: 1em auto 1em auto;" | |||
|- | |- | ||
! Field Name !! Properties | ! Field Name !! Properties | ||
| Line 70: | Line 84: | ||
| Change Password || This to Change the Default '''ADMIN''' password.<br> Default '''ADMIN''' password is '''ADMIN'''. | | Change Password || This to Change the Default '''ADMIN''' password.<br> Default '''ADMIN''' password is '''ADMIN'''. | ||
|} | |} | ||
:12. Double Click the Company Name. | |||
[[File:Installation.Standalone07.jpg|center]] | |||
:13. Enter the User Name & Password As '''ADMIN''' & Click Log on (assuming the password is not change on step 7). | |||
[[File:Installation.Standalone08.jpg|center]] | |||
{| class="wikitable" style="margin: 1em auto 1em auto;" | |||
: | |||
|- | |- | ||
! Field Name !! Properties | ! Field Name !! Properties | ||
| Line 90: | Line 97: | ||
| Remember password || Tick this option (Not Recommended) for who don't want to type password every time open the database. | | Remember password || Tick this option (Not Recommended) for who don't want to type password every time open the database. | ||
|} | |} | ||
<div style="float: right;"> [[#top|[top]]]</div> | |||
==See also== | |||
* [[Firebird]] | |||
* [[Network]] | |||
Latest revision as of 06:30, 4 March 2022
Introduction
Standalone is the License for Single User.
Setup
- 01. Double click the SQL Product icon at the desktop and the below dialog will appear.
- 02. Click on Custom Settings button.
- 03. Click Create Group
- 04. Select the Location where you wanted to save for the DCF File.
Default is at C:\estream\SQLAccounting\Share
- 05. Select Firebird Standalone Database at Database Engine
- 06. Select the Database Folder & click Ok.
Default is at C:\estream\SQLAccounting\DB
- 07. Click Test Connection to make sure is Blue Status
- 08. Click OK
- 09. Double Click the Firebird Icon.
| Field Name | Properties |
|---|---|
| Create Group | Create New DCF file. Normally use at Server or Standalone use. |
| Add Group | Add Existing DCF file. Normally use at workstation. |
|
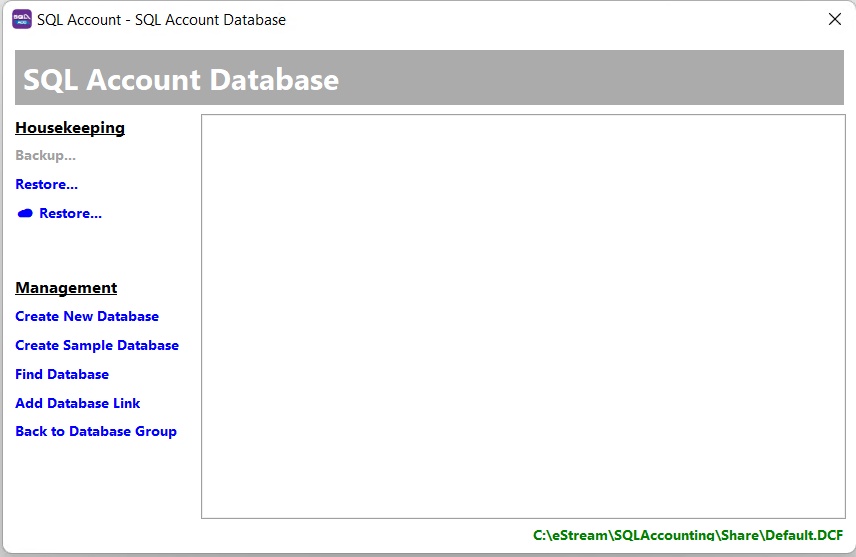
- 10. Click New Database On left Panel.
| Field Name | Properties |
|---|---|
| Backup | To Backup Selected Database |
| Restore | To Restore from the Backup |
| Create New Database | To Create New Database with empty transaction |
| Create Sample Database | Create a Database with sample transactions |
| Find Database | Auto Find & add back the database which already drop link |
| Add Database | Manually add back the database which already drop link |
|
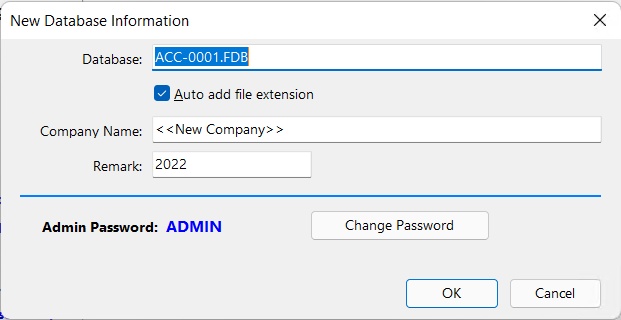
- 11. Enter the Company Name & Click OK.
| Field Name | Properties |
|---|---|
| Database | Database Name. May leave it as Default. |
| Company Name | A Full Company Name you wanted to use for. |
| Remark | This useful if you wanted to create 2 or more Same Company Name but for Different Year or Location. |
| Change Password | This to Change the Default ADMIN password. Default ADMIN password is ADMIN. |
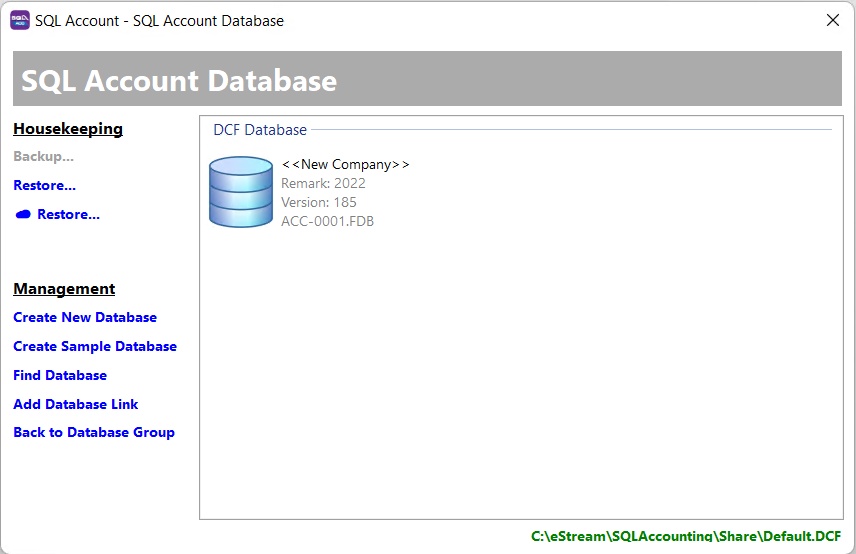
- 12. Double Click the Company Name.
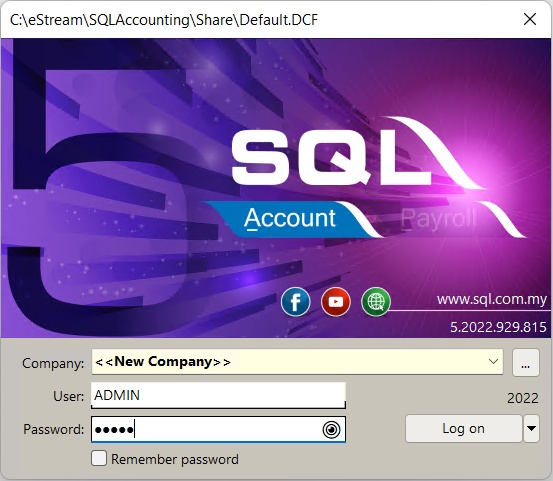
- 13. Enter the User Name & Password As ADMIN & Click Log on (assuming the password is not change on step 7).
| Field Name | Properties |
|---|---|
| 3 Dot Button | To Go back to DCF Database list. |
| Remember password | Tick this option (Not Recommended) for who don't want to type password every time open the database. |
