(→Steps) |
|||
| Line 72: | Line 72: | ||
:03. Click '''Save''' button | :03. Click '''Save''' button | ||
:04. Click ''Database | Connect'' | :04. Click ''Database | Connect'' | ||
====Update/Reuse Registered Database==== | |||
[[File:FlameRobin-05.jpg|center]] | |||
:01. Select here | |||
:02. Click ''Database | Database Registration Info ...'' | |||
:03. You will see same as ''Steps 02 Register New Database'' at above | |||
:04. Just change the '''Display name''' (optional) & '''Database path''' | |||
:05. Click '''Save''' button | |||
:06. Click ''Database | Connect'' | |||
Revision as of 01:31, 22 November 2016
Introduction
Is an External Firebird Console Application.
|
Program
- Flame Robin Homepage
- Alternative Download
- MD5 : 52F515BAA34F2A1DFA986AAFF7D9DB3E (Alternative Link Only)
Installation
Using Official download
- Just Double Click the Setup & Follow the Setup wizard.
Using Alternative Download
- Just Unzip/Extract the file to the location you wanted.
Steps
Server Information
- Only 1 time setting for each Firebird Version
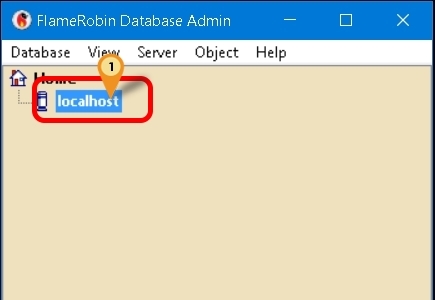
- 01. Right Click Here
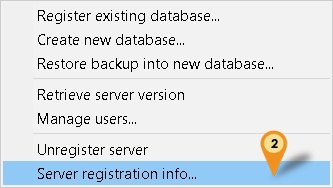
- 02. Select Server registration info...
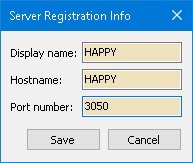
- 03. Enter as following
| Field | Description |
|---|---|
| Display name | Can be anything (eg Happy) |
| Hostname | Server Name/IP Address |
| Port Number | Firebird Port number (default is 3050) |
- 04. Click Save button
Register Database
- Can add more then 1 database if you wanted to but if can just register only 1 to & you can just keep reuse the same setting
Register New Database
- 01. Click Database | Register existing database...
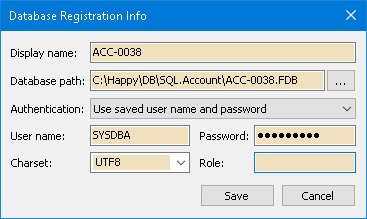
- 02. Enter as following
| Field | Description |
|---|---|
| Display name | Can be anything (eg ACC-0038) |
| Database path | The Firebird FDB file path |
| Authentication | Use only Use saved user name and password |
| User name | Firebird default user name (SYSDBA) |
| Password | Firebird default password (masterkey) |
| Charset | Use only NONE |
| Role | Leave it empty |
- 03. Click Save button
- 04. Click Database | Connect
Update/Reuse Registered Database
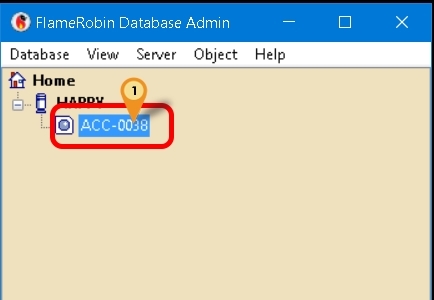
- 01. Select here
- 02. Click Database | Database Registration Info ...
- 03. You will see same as Steps 02 Register New Database at above
- 04. Just change the Display name (optional) & Database path
- 05. Click Save button
- 06. Click Database | Connect

