(Created page with "==Introduction== This divide into 2 section * Server PC Setup * Workstation PC Setup ==Server Setup== 1. Install Firebird.<br> 2. Follow the Standalone Installation ''...") |
|||
| (7 intermediate revisions by the same user not shown) | |||
| Line 4: | Line 4: | ||
* Workstation PC Setup | * Workstation PC Setup | ||
==Server Setup== | ==Server Setup== | ||
:01. Install [[Firebird]]. | |||
:02. Follow the [[Standalone]] Installation '''Step 1''' to '''Step 4'''. | |||
:03. For '''Step 5'''. | |||
[[File:Installation.Network01.jpg|center]] | |||
{| class="wikitable" | {| class="wikitable" | ||
|- | |- | ||
| Line 23: | Line 23: | ||
Be '''ALEART''' on using this option. As Lost/forget password will cause user unable to [[Restore Database]] & Edit the DCF file. | Be '''ALEART''' on using this option. As Lost/forget password will cause user unable to [[Restore Database]] & Edit the DCF file. | ||
|} | |} | ||
{| style="margin: 1em auto 1em auto;" | |||
|- | |||
| | |||
---------------------------------------------------------------------------------------------------------------------------------------------------- | |||
{| | |||
|- | |||
| [[File:Template.Tips-01.jpg|60px]]|| Make sure the Server IP Address is always Fixed. | |||
|} | |||
---------------------------------------------------------------------------------------------------------------------------------------------------- | |||
|} | |||
4. Continue follow the [[Standalone]] Installation '''Step 5''' till end.<br> | 4. Continue follow the [[Standalone]] Installation '''Step 5''' till end.<br> | ||
5. Make a full share for the Folder you had save for the DCF File. | 5. Make a full share for the Folder you had save for the DCF File. | ||
Default is at ''C:\estream\SQLAccounting\Share'' | Default is at ''C:\estream\SQLAccounting\Share'' | ||
<div style="float: right;"> [[#top|[top]]]</div> | |||
==Workstation Setup== | ==Workstation Setup== | ||
:01. Follow the [[Standalone]] Installation '''Step 1''' to '''Step 2'''. | |||
:02. For '''Step 3''' Click '''Add Group''' | |||
:03. Look for the DCF file at Server Share Folder in My Network Place. | |||
[[File:Installation.Network02.jpg|center]] | |||
:04. Click Open. | |||
:05. Double Click the Firebird Icon. | |||
[[File:Installation.Standalone04.jpg|center]] | |||
:06. Follow the [[Standalone]] Installation '''Step 12''' to '''Step 13''' | |||
<div style="float: right;"> [[#top|[top]]]</div> | |||
==See also== | |||
* [[Firebird]] | |||
* [[Standalone]] | |||
Latest revision as of 09:52, 4 March 2022
Introduction
This divide into 2 section
- Server PC Setup
- Workstation PC Setup
Server Setup
- 01. Install Firebird.
- 02. Follow the Standalone Installation Step 1 to Step 4.
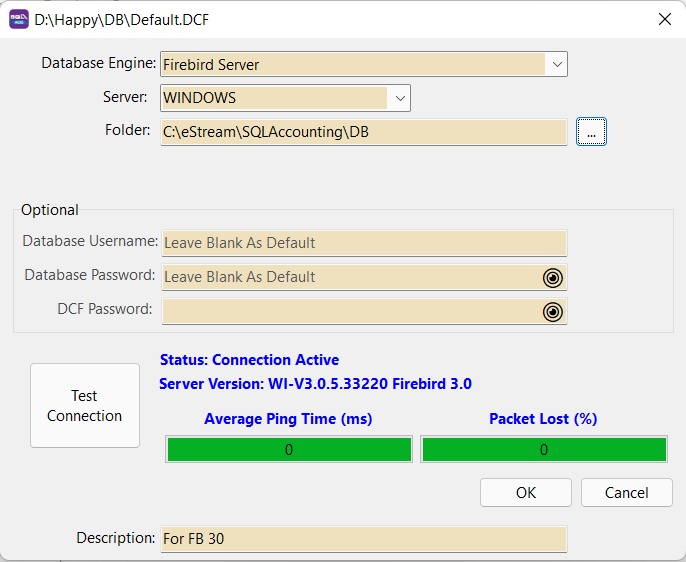
- 03. For Step 5.
| Field Name | Properties |
|---|---|
| Database Username | Firebird Database Username. Leave it Empty if using Default Default Firebird Database Username is SYSDBA |
| Database Password | Firebird Database Password. Leave it Empty if using Default Default Firebird Database Password is MASTERKEY |
| DCF Password | Password to Edit the DCF file.Be ALEART on using this option. As Lost/forget password will cause user unable to Restore Database & Edit the DCF file. |
4. Continue follow the Standalone Installation Step 5 till end.
5. Make a full share for the Folder you had save for the DCF File.
Default is at C:\estream\SQLAccounting\Share
Workstation Setup
- 01. Follow the Standalone Installation Step 1 to Step 2.
- 02. For Step 3 Click Add Group
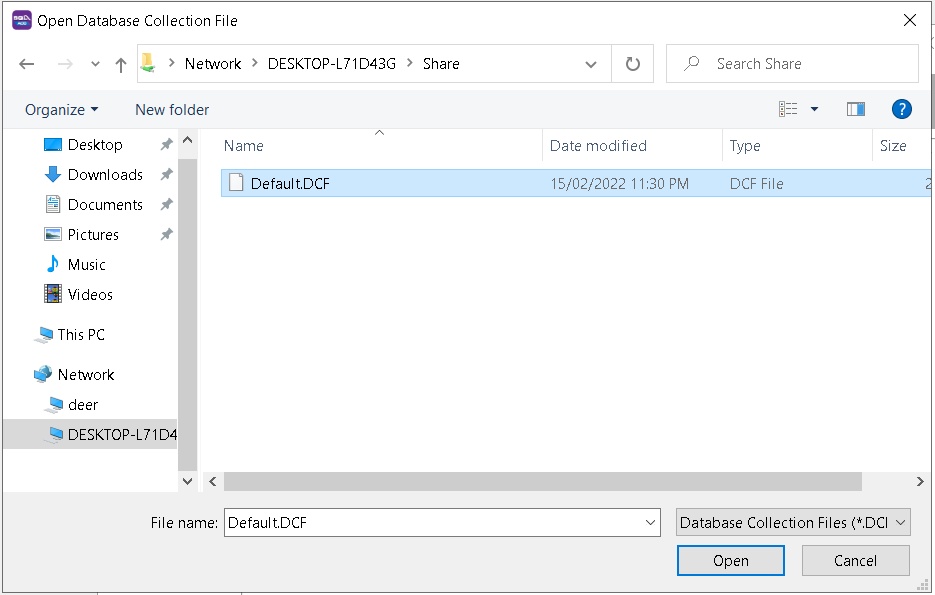
- 03. Look for the DCF file at Server Share Folder in My Network Place.
- 04. Click Open.
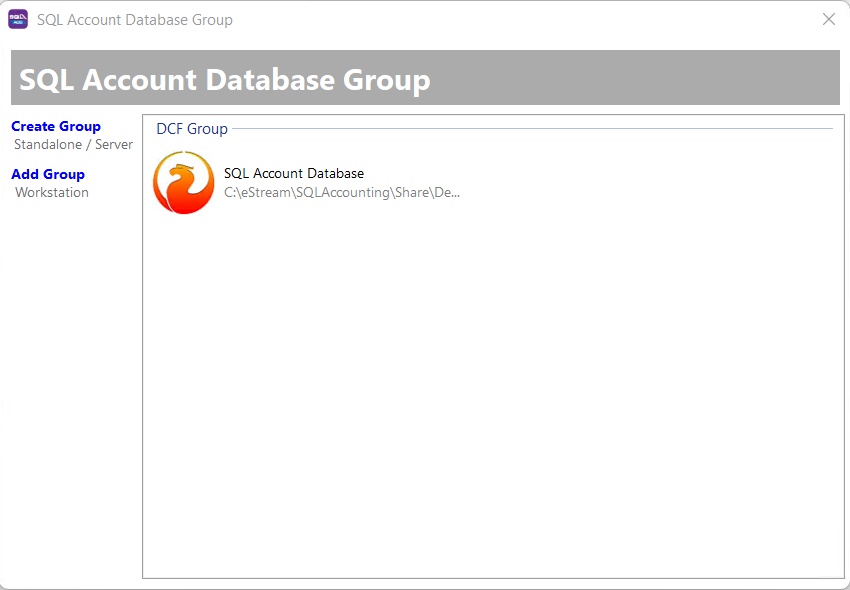
- 05. Double Click the Firebird Icon.
- 06. Follow the Standalone Installation Step 12 to Step 13


